The Intel Edison is an amazing little device, but the current SDK only works out of the box with Eclipse, and creating new projects is not very easy.
In this post, I will show you how to use CMake and Qt Creator to develop for the Intel Edison remotely. This allows you to use the power of CMake to create new projects, and the convenience of Qt Creator, a great cross platform IDE for C/C++.
This guide should work for all major platforms (Windows, Mac, Linux, 32 and 64 bits) with little or no changes at all.
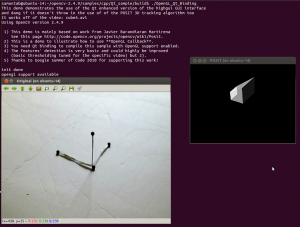
Here you can see a Windows machine running a debugging session with the Edison using Qt Creator:
Required software
- First of all, make sure that you have everything installed for your system to communicate with the Edison. The guys at SparkFun already covered this here.
- Also, make sure that you have Qt Creator and CMake installed as well. Note that we are only using the Qt Creator IDE, so you don’t need to install the entire Qt SDK if you are not going to use it in your application.
Cross compiling
We are going to cross compile for the Edison. This means that we are going to build an executable (or library) for a target OS that is different from the host OS. In this case, the target OS is the Edison’s Yocto Linux and the host OS is the OS that you are running (Windows, Linux, Mac, 32 or 64 bits). Cross compiling means that the host OS compiles something for the target OS. Easy. In order to do this, you will need to have a set of applications for your host OS that allow you to compile for the target OS, as well as the libraries and include files of the target system. These things as a whole are called a toolchain.
The toolchain
Intel provides this toolchain for all the major OS on the main downloads site. Download the one for your OS under the section SDK Cross compile tools.
For Linux, just install it under the default directory:
/opt/poky-edison/1.6.1
For Windows, decompress the files (twice) and save them under C:/Edison.
You will end up with this directory structure for the 64 bits SDK:
C:/Edison/poky-edison-eglibc-x86_64-edison-image-core2-32-toolchain-1.6.1
And this directory structure for the 32 bits SDK:
C:/Edison/poky-edison-eglibc-i686-edison-image-core2-32-toolchain-1.6.1
Note that these locations are important because they will be referred to in the Qt Creator configuration and in the CMake script.
Make under Windows
There is a utility that was not included in the toolchain, a Make generator. The Eclipse version of the SDK uses an Eclipse internal tool to do the Make step. Since we are not using Eclipse, we will provide our own make generator tool. MinGW64 will help us here. It is a “Minimalist GNU for Windows”. Just download and install it in the default directory. Take a note of the installation directory because it is referred to in the CMake script, and it will probably change in future releases of MinGW64.
Qt Creator configuration
We are going to define a new device for development on Qt.
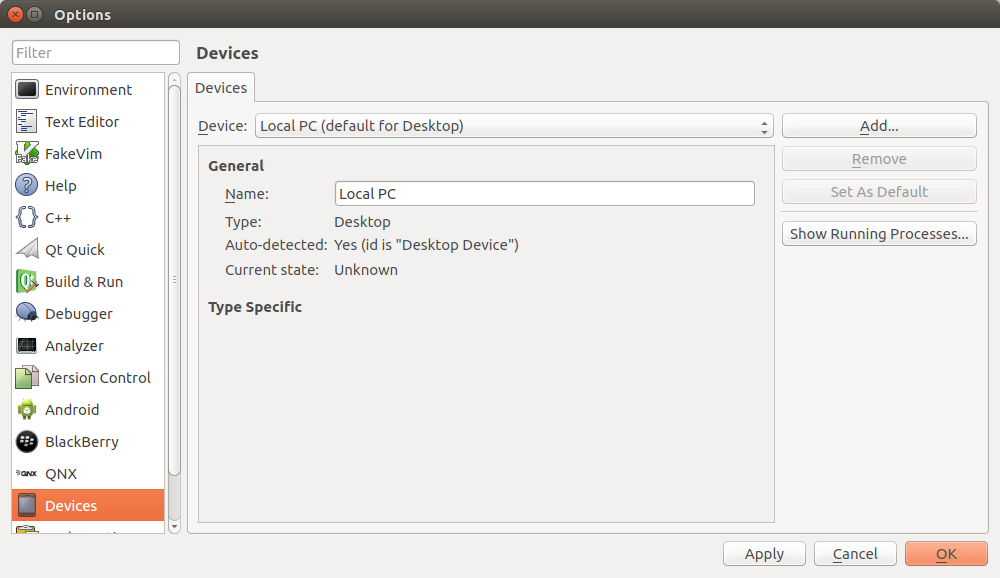
Open Qt Creator. Go to Tools->Options. On the left side, select Devices.
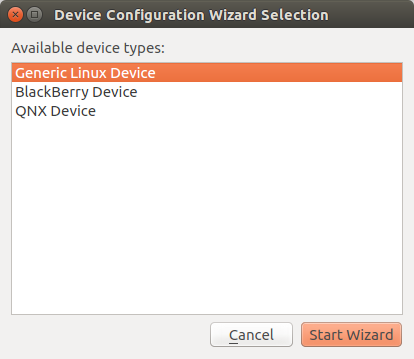
Click on Add, and select Generic Linux Device. Click on Start Wizard.
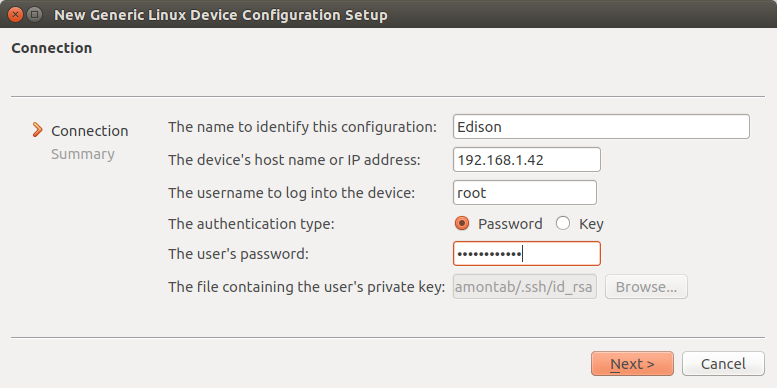
Set the name as Edison, or any name that you want here, the IP address of the Edison (something that may look like 192.168.1.42 for example), root as the username, and your current password. Click next when done.
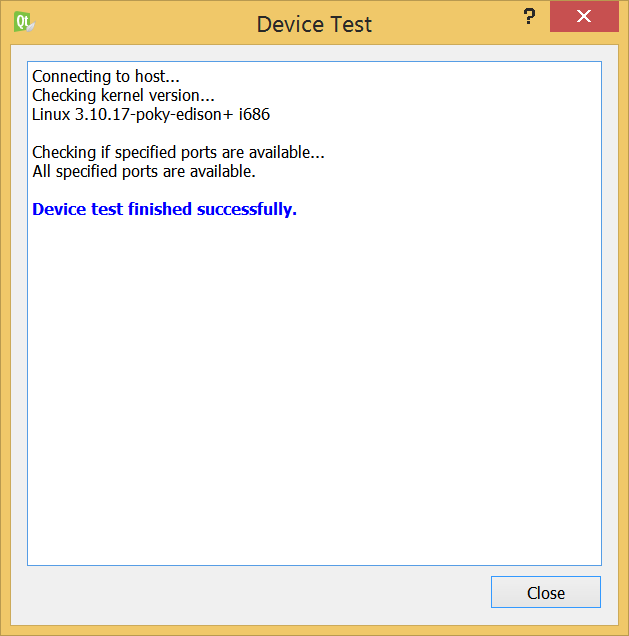
The device will then be tested for connectivity, and everything should be fine. If there is any problem, edit the settings and try again.
Now we are going to create a Qt kit to use with this device. Go to Build & Run and select the Compilers tab.
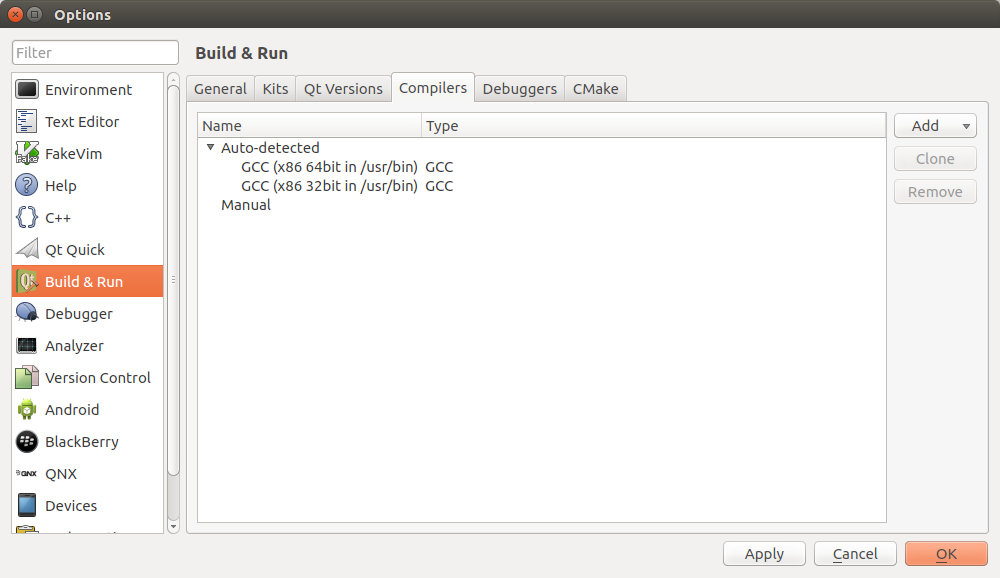
Once you are there, and select Add->GCC. Under Name, you can change it to anything you want. Under compiler path, you have to select the C++ compiler for your host OS. These are specified in the CMake script, but I will put them here as well for reference, but always make sure to double check your actual path:
Windows hosts(64 bits):
C:/Edison/poky-edison-eglibc-x86_64-edison-image-core2-32-toolchain-1.6.1/sysroots/x86_64-pokysdk-mingw32/usr/bin/i586-poky-linux/i586-poky-linux-g++.exe
Windows hosts(32 bits):
C:/Edison/poky-edison-eglibc-i686-edison-image-core2-32-toolchain-1.6.1/sysroots/i686-pokysdk-mingw32/usr/bin/i586-poky-linux/i586-poky-linux-g++.exe
Linux hosts (64 bits):
/opt/poky-edison/1.6.1/sysroots/x86_64-pokysdk-linux/usr/bin/i586-poky-linux/i586-poky-linux-g++
Linux hosts (32 bits):
/opt/poky-edison/1.6.1/sysroots/i686-pokysdk-linux/usr/bin/i586-poky-linux/i586-poky-linux-g++

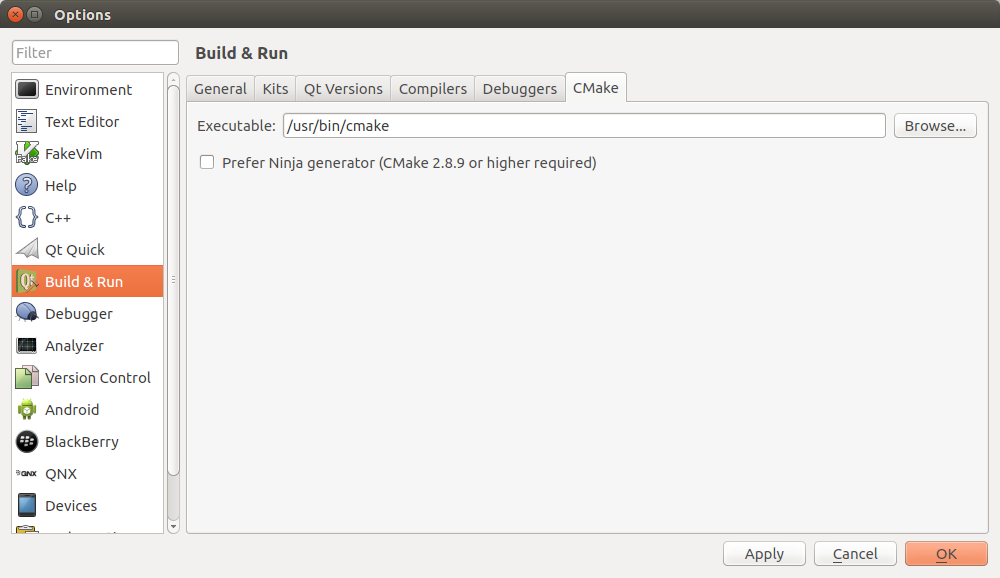
Now go to the cmake tab and make sure that you have the cmake executable listed there.
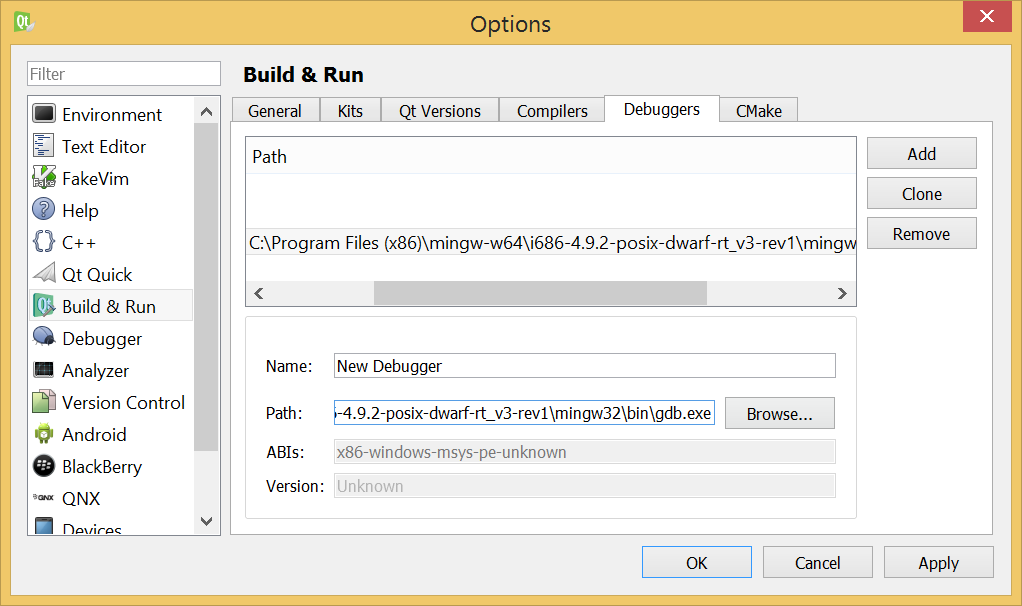
Let’s add debugging capabilities. Go to the Debuggers tab and click on Add. Under Path, select the path to your gdb executable (This is part of the previously installed Mingw64 if you are on Windows, or just gdb if you are on Linux). You can change the name if you want.
Now we are ready to define a Qt Kit. Click on the Kits tab and click on Add.
Here you will set all the values that you created previously. Under Name you can put Edison or anything you want. Leave File system name blank. Under Device type select Generic Linux Device. This should automatically select Edison as your Device. Set your Sysroot to ({PATH_TO_SDK}/sysroots/core2-32-poky-linux), where PATH_TO_SDK depends on your OS as you saw earlier. Select GCC as your compiler (the one you previously defined). Under debugger set it to New Debugger, and finally under Qt version set it to None as well since we are not using the Qt SDK.
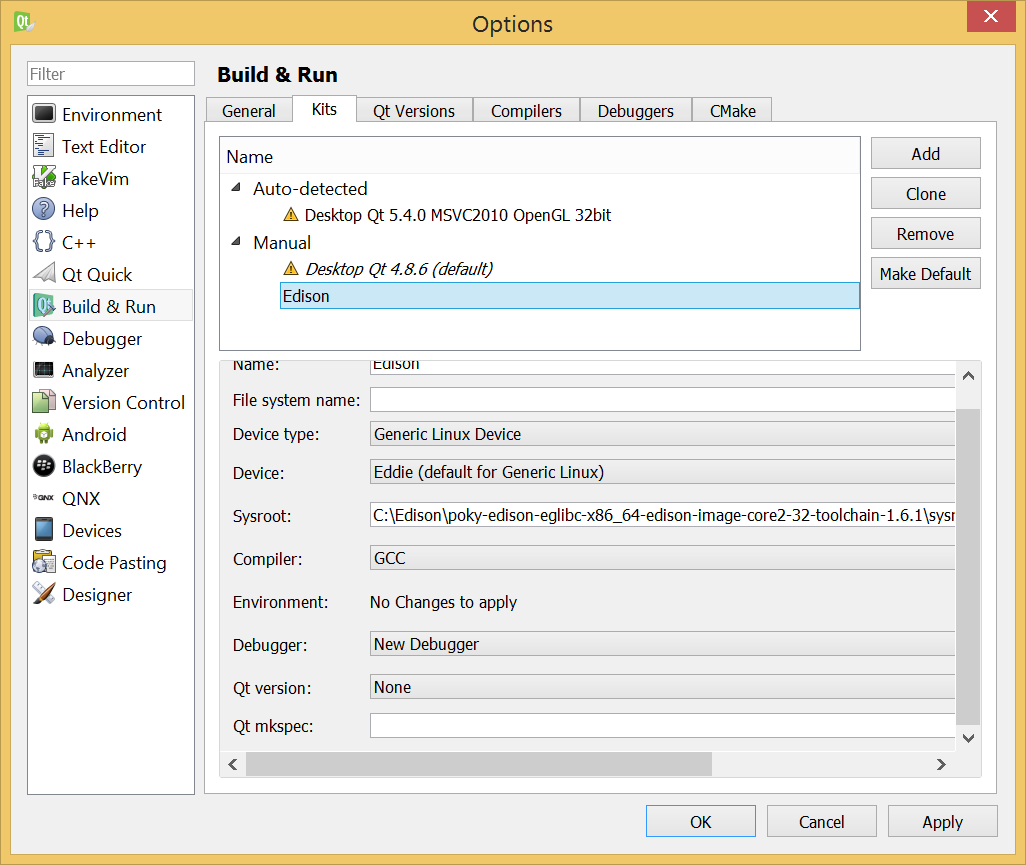
Click OK and now Qt Creator is configured to build Edison projects.
The CMake script
This is what defines your project or application. This is going to be the script that describes what we want to do. In particular we will tell CMake that we want to do a cross compile for the Edison, and specify which libraries we want to use, as well as where our source files are, and what libraries we are going to use. There are two files, one that deals with all the details about cross compiling (Edison.cmake), and the other file that deals with your actual project (CMakeLists.txt).
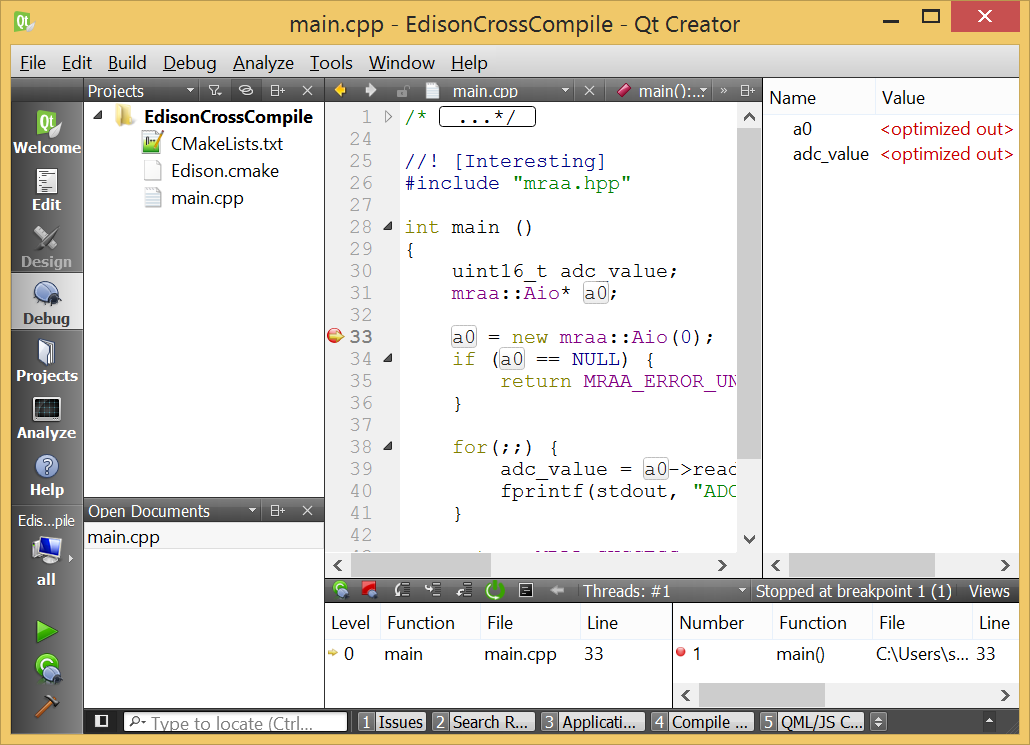
You can download the project files here. I added a simple mraa example as the main.cpp that reads ADC A0 analog input, provided by Brendan Le Foll. Note that some boards like the mini breakout do not have this ability built in so they will return an error. That’s expected. The key here is to make the program compile and run on the Edison, not what the program actually does.
Edison.cmake
This file defines everything you need to deploy your application into the Edison. You will only need to setup this once, and you will be able to use this file in other projects. I will go through each section of the file explaining what it does.
The following code basically allows you to manually select which version of the SDK you are planning to use, 32 or 64 bits. Comment (add a # symbol) to the line you don’t want, and uncomment the line you want. Easy. By default it is set to use the 64 bits SDK.
#Are you using the 32 or the 64 bits version of the SDK?.
set(SDK_32bits FALSE) #Use this line for the 64 bits SDK
#set(SDK_32bits TRUE) #Use this line for the 32 bits SDK
This is straight forward. Just define where you want your application to be copied to into the Edison (currently it will be copied to /home/root).
#You can change this to any absolute folder in your Edison
#This is the folder where the executable will be copied to.
set(deploymentFolderAbsolutPath /home/root)
The following code defines the properties of the target OS. No need to change anything here.
#Set the target parameters
set(CMAKE_SYSTEM_NAME Linux)
set(CMAKE_SYSTEM_VERSION 3.10.17-poky-edison+)
set(CMAKE_SYSTEM_PROCESSOR i686)
This is where all the paths to the SDK are set. Your OS is identified by cmake, and the version of the SDK (32 or 64 bits) was manually defined earlier. You may only need to change the paths to your specific installations but it may just work as it is.
#Set the host parameters
if(WIN32)
    #Windows host
	if(${SDK_32bits})
		#32 bit SDK
		set(edison_sdk_root D:/Edison/poky-edison-eglibc-i686-edison-image-core2-32-toolchain-1.6.1)
		set(cross_compiler_sysroot ${edison_sdk_root}/sysroots/i686-pokysdk-mingw32)
		#MinGW make
		set(CMAKE_MAKE_PROGRAM "C:/Program Files/mingw-w64/i686-4.9.2-posix-dwarf-rt_v3-rev1/mingw32/bin/mingw32-make.exe")
	else()
		#64 bit SDK
		set(edison_sdk_root C:/Edison/poky-edison-eglibc-x86_64-edison-image-core2-32-toolchain-1.6.1)
		set(cross_compiler_sysroot ${edison_sdk_root}/sysroots/x86_64-pokysdk-mingw32)
		#MinGW make
		set(CMAKE_MAKE_PROGRAM "C:/Program Files (x86)/mingw-w64/i686-4.9.2-posix-dwarf-rt_v3-rev1/mingw32/bin/mingw32-make.exe")
	endif()
	set(CMAKE_C_COMPILER ${cross_compiler_sysroot}/usr/bin/i586-poky-linux/i586-poky-linux-gcc.exe)
	set(CMAKE_CXX_COMPILER ${cross_compiler_sysroot}/usr/bin/i586-poky-linux/i586-poky-linux-g++.exe)
else()
	#Linux host
	if(${SDK_32bits})
		#32 bit SDK
		set(edison_sdk_root /opt/poky-edison/1.6.1)
		set(cross_compiler_sysroot ${edison_sdk_root}/sysroots/i686-pokysdk-linux)
	else()
		#64 bit SDK
		set(edison_sdk_root /opt/poky-edison/1.6.1)
		set(cross_compiler_sysroot ${edison_sdk_root}/sysroots/x86_64-pokysdk-linux)
	endif()
	set(CMAKE_C_COMPILER ${cross_compiler_sysroot}/usr/bin/i586-poky-linux/i586-poky-linux-gcc)
	set(CMAKE_CXX_COMPILER ${cross_compiler_sysroot}/usr/bin/i586-poky-linux/i586-poky-linux-g++)
ENDIF(WIN32)
The following defines the rest of the cross platform configuration for the Edison, include folders, compiler flags, etc. No need to make changes here unless you know what you are doing.
set(CMAKE_SYSROOT ${edison_sdk_root}/sysroots/core2-32-poky-linux)
set(CMAKE_FIND_ROOT_PATH ${CMAKE_SYSROOT})
set(CMAKE_FIND_ROOT_PATH_MODE_PROGRAM NEVER)
set(CMAKE_FIND_ROOT_PATH_MODE_LIBRARY ONLY)
set(CMAKE_FIND_ROOT_PATH_MODE_INCLUDE ONLY)
set(CMAKE_FIND_ROOT_PATH_MODE_PACKAGE ONLY)

SET(CMAKE_C_FLAGS "-Os -g3 -Wall --sysroot=${CMAKE_SYSROOT} -m32 -march=i586 -ffunction-sections -fdata-sections"  CACHE STRING "" FORCE)
SET(CMAKE_CXX_FLAGS "-Os -g3 -Wall --sysroot=${CMAKE_SYSROOT} -m32 -march=i586 -ffunction-sections -fdata-sections"  CACHE STRING "" FORCE)

INCLUDE_DIRECTORIES(${CMAKE_SYSROOT}/usr/include)
INCLUDE_DIRECTORIES(${CMAKE_SYSROOT}/usr/include/c++)
INCLUDE_DIRECTORIES(${CMAKE_SYSROOT}/usr/include/c++/i586-poky-linux)
And finally this section defines a way to tell Qt to deploy a file
#This is for telling Qt to deploy files
file(WRITE "${CMAKE_SOURCE_DIR}/QtCreatorDeployment.txt" "/\n")
macro(add_deployment_file SRC DEST)
	file(RELATIVE_PATH path ${CMAKE_SOURCE_DIR} ${CMAKE_CURRENT_SOURCE_DIR})
	file(APPEND "${CMAKE_SOURCE_DIR}/QtCreatorDeployment.txt" "${path}/${SRC}:${DEST}\n")
endmacro()
macro(add_deployment_directory SRC DEST)
	file(GLOB_RECURSE files RELATIVE "${CMAKE_CURRENT_SOURCE_DIR}" "${SRC}/*")
	foreach(filename ${files})
		get_filename_component(path ${filename} PATH)
		add_deployment_file("${filename}" "${DEST}/${path}")
	endforeach(filename)
endmacro()
CMakeLists.txt
This is the main file for your project. Every cmake project has at least one of these files.
First, I start defining the minimum version of cmake required for this project, and include the Edison.cmake file that I just described.
cmake_minimum_required(VERSION 2.6)

#This is where all the settings to compile for the Edison are stored.
INCLUDE(${CMAKE_SOURCE_DIR}/Edison.cmake)
This is the actual definition of the project. The name of the project (not the executable) is set as EdisonCrossCompile, and the project is set to compile either C or C++ sources. You can set exe_name to define the name for your application (currently it is set as executableName). I also included a script to update the SDK to the latest libraries versions. It is disabled by default as it overwrites the files. If you want to add this feature (at your own risk), uncomment the line. If you do that, every time CMake is called, you will update your SDK. This is usually at the beginning of the project, and when you click on Build->Run CMake, not when you build your project.
Also, any file that is put in this root directory with extension .cpp or .h will be included in the project. This is a simple way to start a new project. More complex projects can, of course, use the full cmake syntax to define their source structure. Also, I add libmraa as an example of how to use external libraries. The rest is to build and link the executable.
PROJECT(EdisonCrossCompile C CXX)

#This is for updating the local SDK to the latest version of mraa and upm
#Uncomment this line to update your SDK every time you run CMake (not every time you build your project)
#INCLUDE(${CMAKE_SOURCE_DIR}/updateSDK.cmake)

#This is the name of the compiled program. Change executableName to anything you want.
set(exe_name executableName)


#Here I am defining the source and header files of the project. You can just put .cpp and .h files into this folder and they will get compiled.
file(GLOB cpp_files *.cpp)
file(GLOB h_files *.h)

#Here you can include extra libraries for your application, like libmraa (http://iotdk.intel.com/docs/master/mraa/) for example
set(extra_libraries -lmraa)

#The actual compilation and linkage
add_executable(${exe_name} ${cpp_files} ${h_files})
target_link_libraries(${exe_name} ${extra_libraries})
Finally, this is used to copy the executable over to the Edison and execute it there.
#This tells Qt which file to copy over to the Edison.
file(RELATIVE_PATH relativeDir ${PROJECT_SOURCE_DIR} ${PROJECT_BINARY_DIR}/${exe_name})
add_deployment_file(${relativeDir} ${deploymentFolderAbsolutPath})
Opening your project in Qt Creator
Once you have your project configured, you will be able to open it under Qt Creator. Click on File->Open File or Project and select your CMakeLists.txt file.
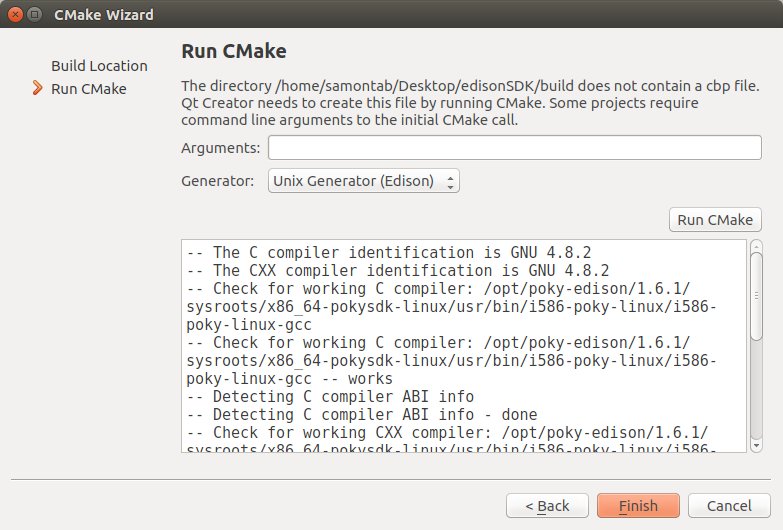
You will see a windows asking you for the build location. This is where the build files are going to be created, and where by default your executable will be created. Usually this is a folder called build under the root of your project. Click Next.

Now under Generator select Unix Generator(Edison). If you don’t see this option, go back to the section called Qt Creator configuration in this guide and do it properly.
Click on Run CMake and wait for a couple of seconds. Everything should work fine. Click on Finish when it is done.
You should now see all your project files listed in the Qt Creator IDE.
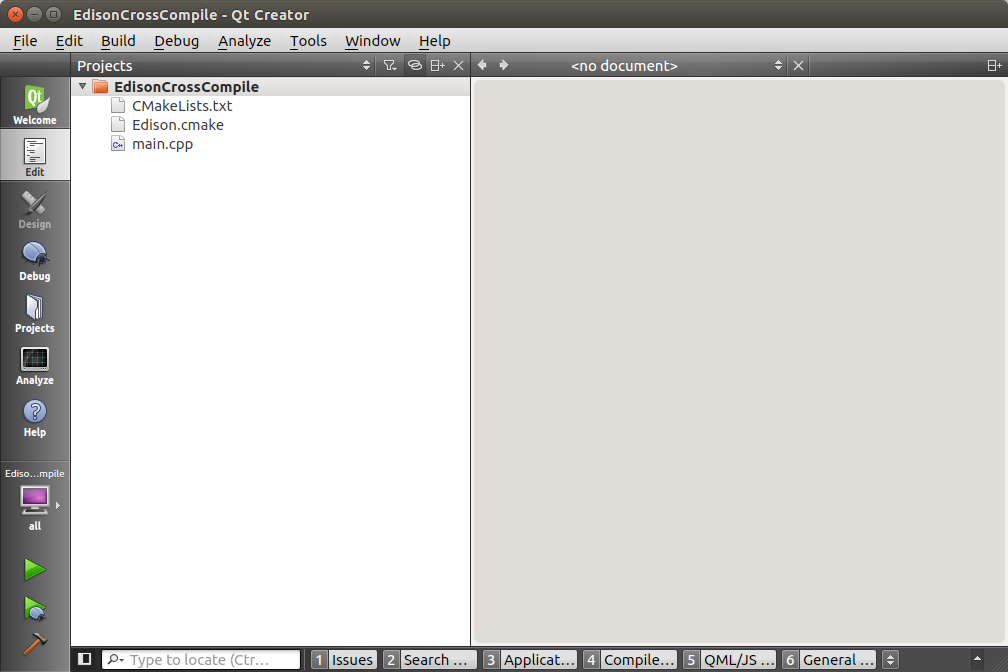
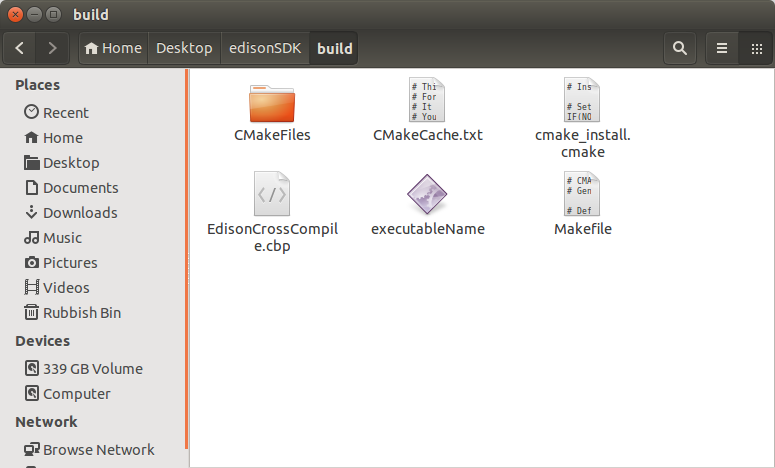
Click on the build icon (the brown hammer icon in the lower left section), and your project should build fine. You can actually see the compiled executable file for the Edison ready to be used in the build folder that you selected before.
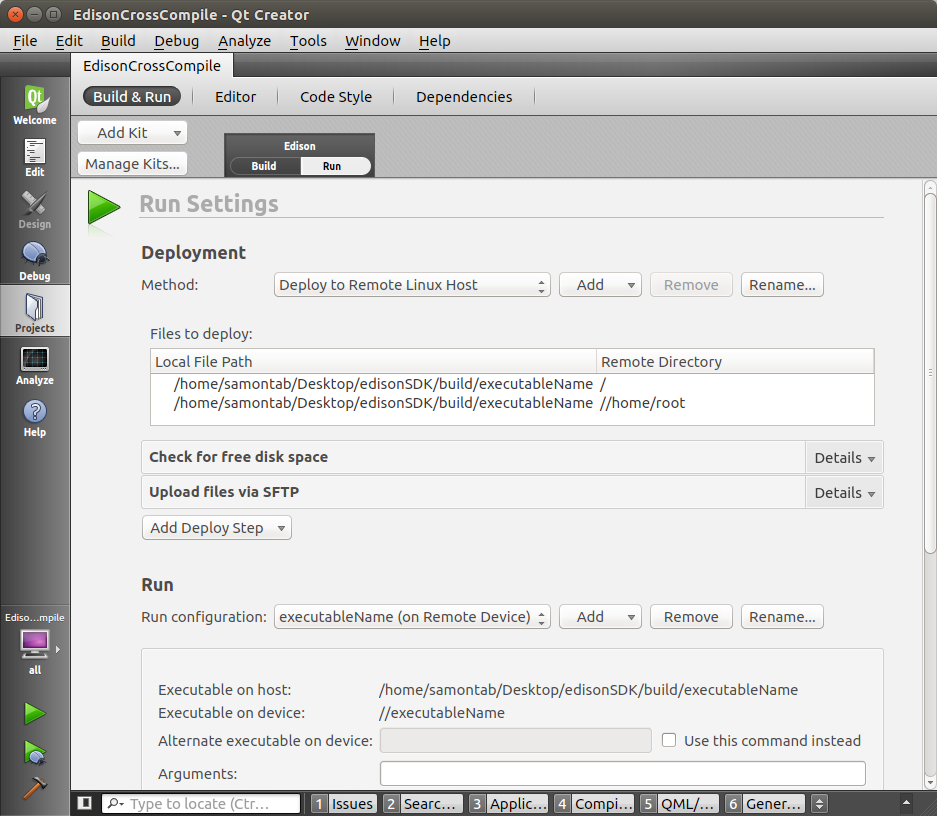
You can now manually copy this file over to the Edison and it will run fine there. But we will add an extra setting that will allow us to execute it directly from the Qt Creator IDE.
Click on Projects and click on Run (there is a small Build | Run selection right below the name of the project, on the upper side of the window). Under the Run section, under Run configuration, click on Add and select executableName(on Remote Device). Now you should be able to click on the build icon(Hammer symbol), or the build and run icon (green play symbol) and the application will get transferred to the Edison, executed remotely, and you will see the console output on the Qt Creator IDE.
Troubleshooting
Here I will list the most common problems and their solutions.
CMake issues
If anything goes wrong, check that all the paths are correctly set in the cmake script. This is probably where most of the issues will be. You can use message(varName values is: ${varName}) to output the values of cmake variables for debugging.
Also, if you are stuck with an error while changing parameters it is a good idea to delete the entire build directory and start again as sometimes cached variables may still persist with the old values.
Qt Creator issues
If you see this error when building on Qt Creator on Windows: Could not start process “make”, it means that the mingw64 executable was not correctly recognized. The solution here is to go to Projects->Build, and under Build Steps click on Details. Under override command (Available in newer Qt Creator versions) click on Browse and select your mingw32-make.exe file. If you don’t have an override command available, just remove the make step and add a new custom process step and select your mingw32-make.exe file as the command. Repeat the same for the make clean step.