TL:DR; For real-time processing get the Seek Thermal CompactPRO (the one with USB-C) and also grab a USB-C extender cable.
If you don’t need real time processing, you can get any FLIR One as you’ll be able to get absolute temperature readings from the saved images. Note: I’m using referral links in this post, so if you buy something I might receive a commission.
If you’ve read anything about thermal cameras, you would have probably stumbled upon FLIR cameras. They are one of the most popular brands, and a few years ago they created the first affordable USB thermal camera, the FLIR One. Because it is a well known brand and the price is relatively cheap for a thermal camera, I decided to get one of them and see how useful it would be for computer vision applications.
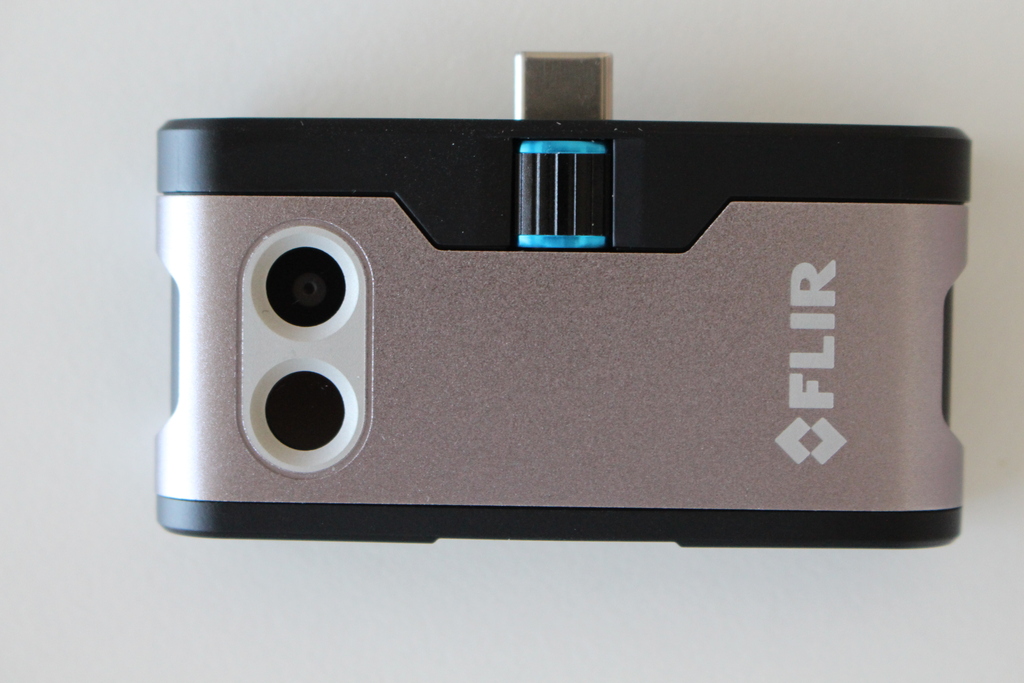
These days, FLIR offers a 3rd generation of this affordable USB thermal camera. They actually have three different models: The FLIR One, the FLIR One Pro, and the FLIR One Pro LT, each one offering different features and different resolutions at different prices. They also make two versions of each, one for iOS and another one with an Android(USB-C) connector. You can check them out here.
All of these FLIR cameras are supposed to be used connected directly to a smartphone, which uses the official FLIR app to communicate with the camera, and show the images on the screen of the phone, with the option to save the images for later processing.
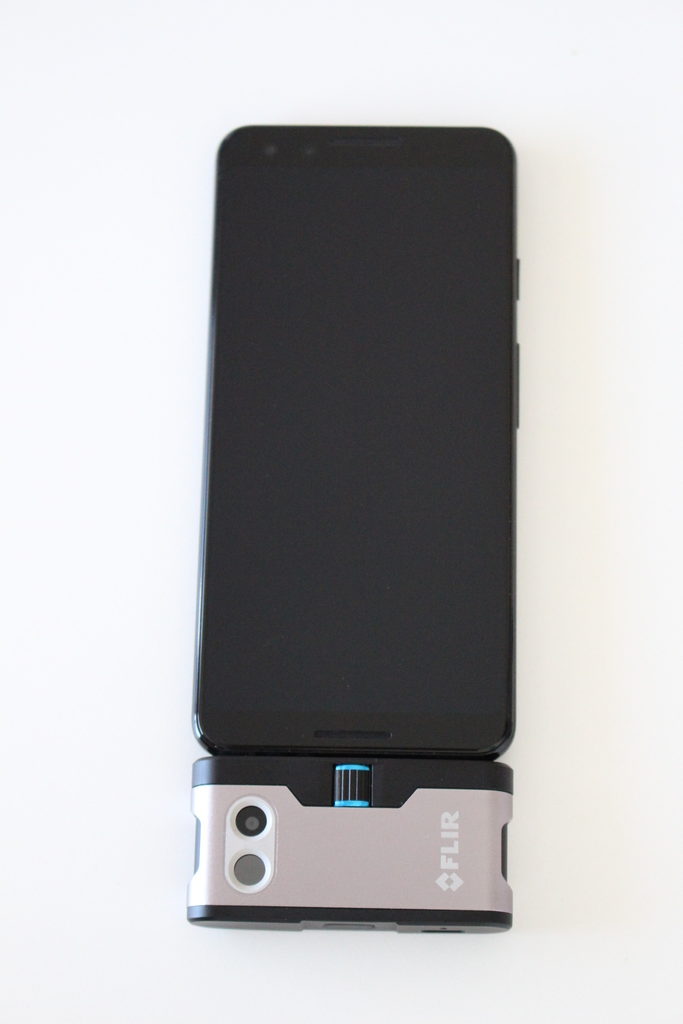
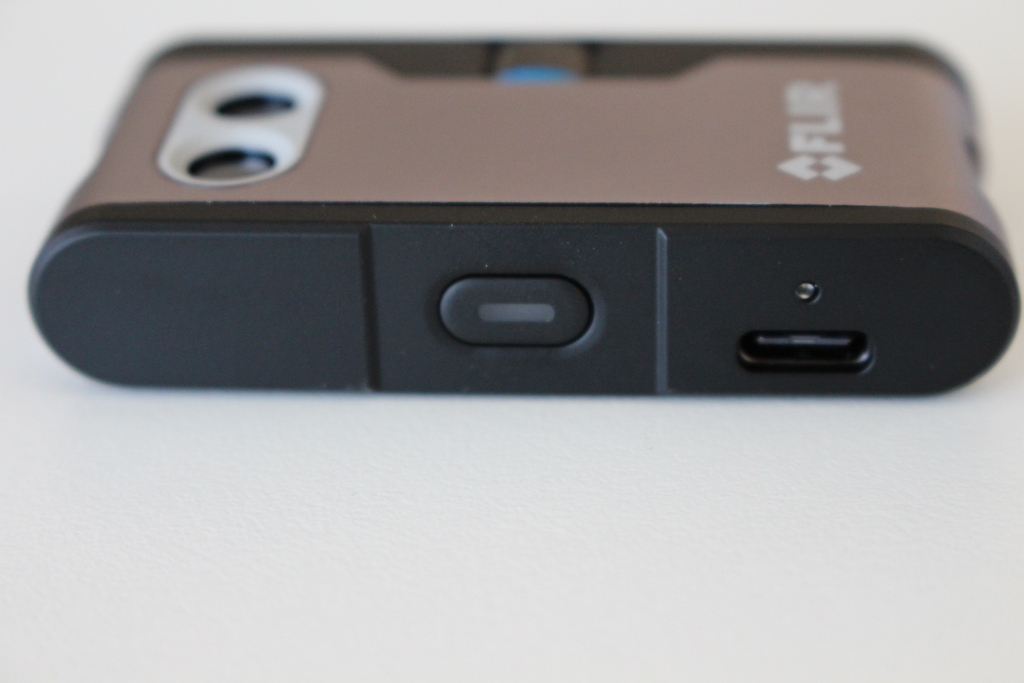
Something that got my attention with these FLIR cameras is that they all come with a rechargeable battery. You need to keep it charged in order to use it, as it doesn’t use the phone battery to power itself.
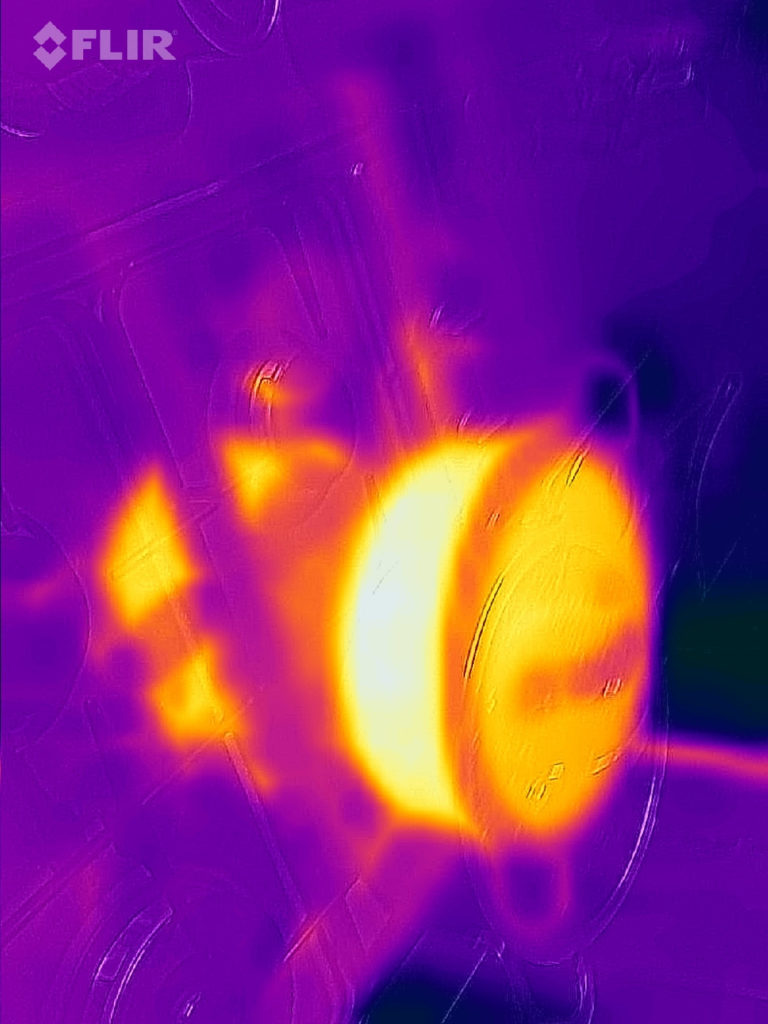
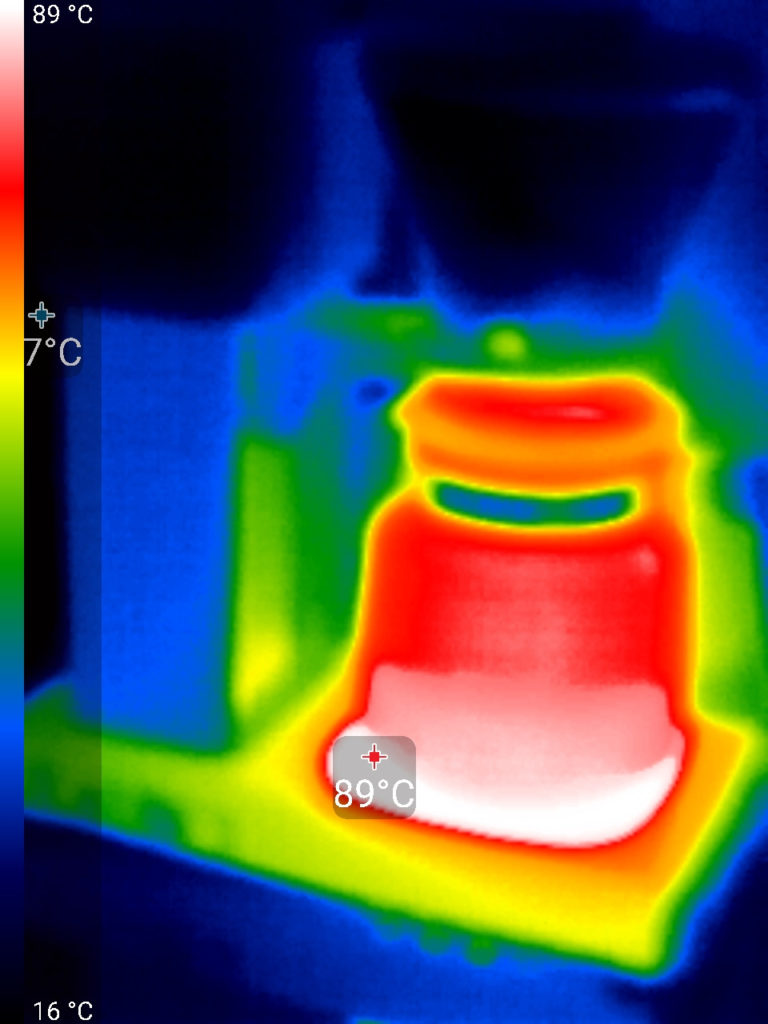
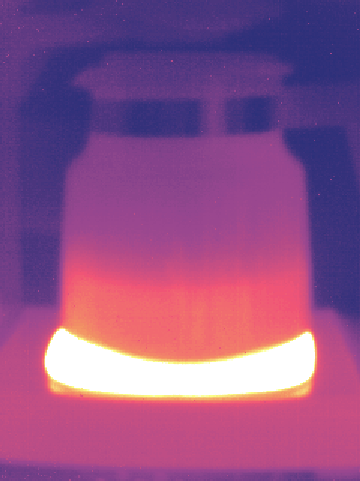
After you install the official FLIR app, charge the camera, and connect it to the phone, you need to turn the camera on and wait for a few seconds. If everything goes right, you should be able to see and save thermal images on your phone, like this one:
After you save the FLIR images you can extract the temperature information per pixel as a csv file, and also the thermal and visual images, using an open source library: read_thermal. You can get the temperature in Celsius per pixel saved as a csv file like this(and also you can get the thermal and RGB images):
python flir_image_extractor.py -p -i FLIR_IMAGE.jpg -csv temps.csv
As far as I know, there is no possible way to use any of these FLIR One thermal cameras in real time connected to a computer. You can only use them connected to a phone, and using the official FLIR app. After you save the images you can then process them in a computer with the previously mentioned library.
After using the FLIR One for a bit I realised it has some pros and cons. It’s great that you can get the absolute temperatures per pixel while post processing the images. It’s also handy to have an RGB image alongside the thermal data. But, the fact that they cannot be used directly from a computer device, and that you need to constantly keep charging their battery makes the FLIR One thermal cameras not a great fit for real time computer vision applications.
Fortunately, there is another brand that makes USB thermal cameras, Seek Thermal:
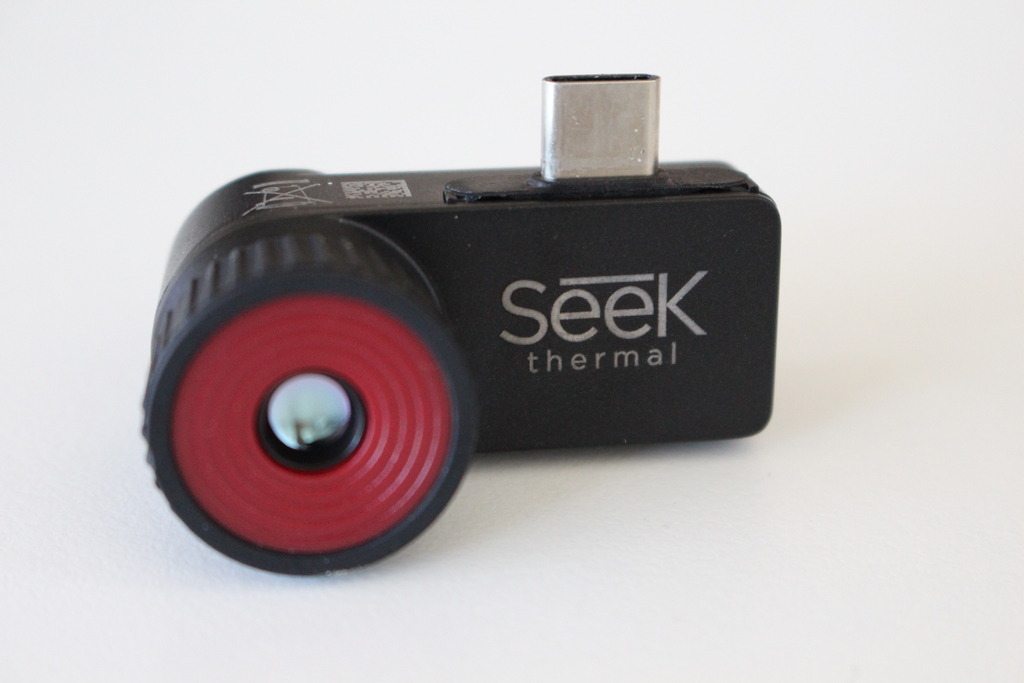
Seek offers two models, the Seek Compact and the Seek Compact Pro. Also, for each model they offer a version with a telephoto lens, marked with an XR suffix. The Seek Compact Pro has a higher resolution(320 x 240) compared to the Seek Compact(206 x 156). The field of view of the Compact Pro is 32° whereas the Compact Pro XR has only a 24° field of view. For general computer vision tasks I found the wider field of view and the higher resolution of the Seek Compact Pro was the best.
Seek also has an official app that you can use with your phone, and it works similar to how the FLIR app works:
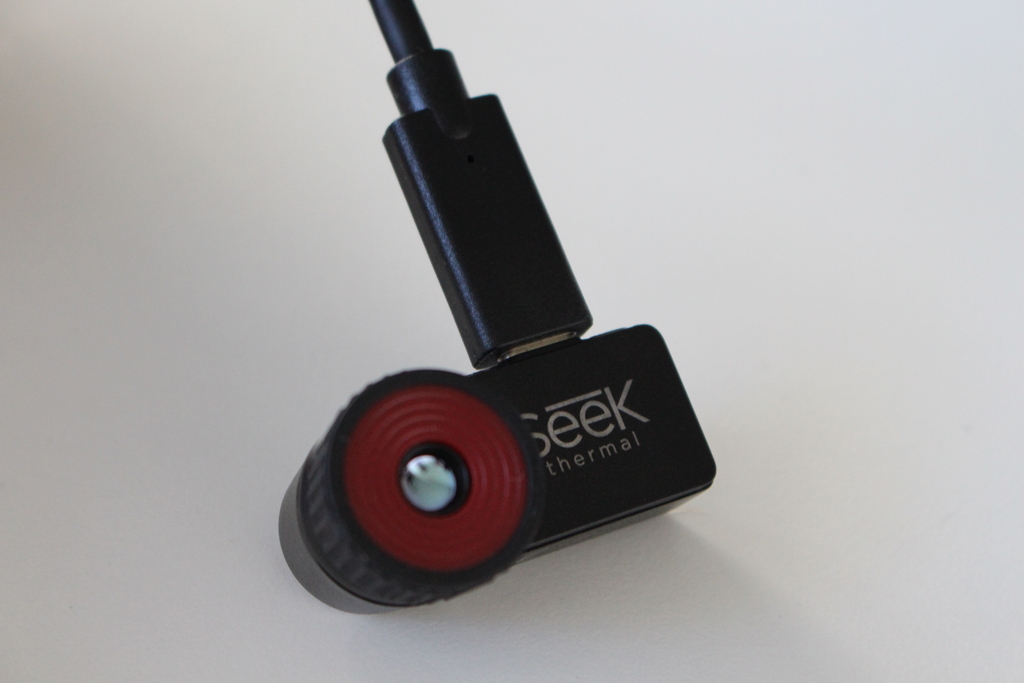
The main advantage for the Seek cameras is that you can also use them on your computer with this great open source project: libseek-thermal. If you’re going to connect the Seek camera to your computer, you should also grab a USB-C extender. If your computer doesn’t have a USB-C connector then you can simply grab a USB converter cable.
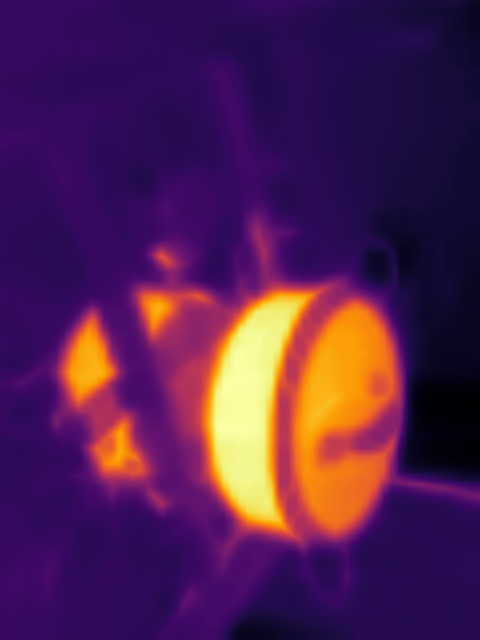
You can now connect the camera to a computer, and by using libseek-thermal you should be able to see thermal images in real time(note that the library as of the time of writing doesn’t provide absolute temperature readings):
So, to summarise, these two cameras are great for doing computer vision but each has some pros and cons, and the best one for you will depend on your specific requirements.
If you need to do real time processing, then the best camera would be the Seek Thermal CompactPRO (the one with USB-C) connected to your computer through either a USB-C extender or a USB converter cable. You won’t have to worry about charging any batteries, and you’ll be able to get the thermal images in real time in your computer. The downside is that you won’t get absolute thermal information. This means you don’t know the exact temperature, you just know which areas are relatively hotter/colder.
If you don’t need to do real time processing, then any FLIR One camera that is compatible with your phone should be fine. You will need to keep the battery charged, and use your phone to save the images using the FLIR official app. But once you have those images in your computer you can post process them and get the absolute temperature values for every pixel. You will also get an RGB view of the scene as well, which might be useful for certain applications.


0 Responses
Stay in touch with the conversation, subscribe to the RSS feed for comments on this post.