OpenCV was initially released about 20 years ago. It’s one of the most well established computer vision libraries in the world, with thousands of algorithm implementations ready to be used in commercial and research applications.
In this guide I’ll show you how to install OpenCV 4.5.0 in your Ubuntu 20.04 LTS and how to create computer vision applications with C++ and Python.
Note: I have noticed some copies of my posts elsewhere, so make sure that you are reading this from the original source, at samontab dot com, accessible from here so that you don’t miss the comments.
First, make sure you have the latest software installed:
sudo apt-get update
sudo apt-get upgrade
Now, you need to install some dependencies, such as support for reading and writing video files, drawing on the screen, some needed tools, etc… This step is very easy, you only need to write the following command in the Terminal:
sudo apt-get install build-essential cmake python3-numpy python3-dev python3-tk libavcodec-dev libavformat-dev libavutil-dev libswscale-dev libavresample-dev libdc1394-dev libeigen3-dev libgtk-3-dev libvtk7-qt-dev
Time to download and compile OpenCV 4.5.0:
wget https://github.com/opencv/opencv/archive/4.5.0.tar.gz
tar -xvzf 4.5.0.tar.gz
rm 4.5.0.tar.gz
cd opencv-4.5.0
mkdir build;cd build
cmake -DBUILD_EXAMPLES=ON ..
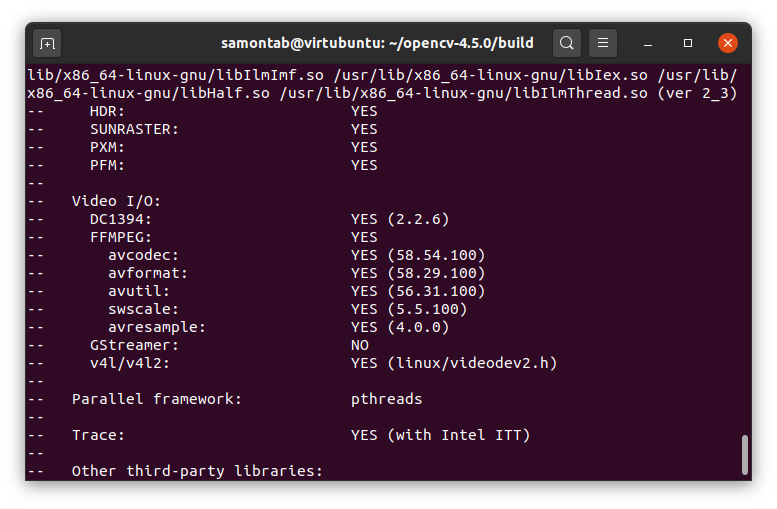
Check that the above command produces no error and that in particular it reports FFMPEG as YES. If this is not the case you will not be able to read or write videos. Double check that every feature you want present in OpenCV is reported correctly. If you’re missing something, make sure to install the missing package and run the cmake line again. In some cases you might need to delete the whole build directory first to get a correct detection. Once you’re happy with what’s shown then we’ll build it. After running the following lines you can go grab a coffee as it will take a long time.
make -j4
sudo make install
echo '/usr/local/lib' | sudo tee --append /etc/ld.so.conf.d/opencv.conf
sudo ldconfig
echo 'PKG_CONFIG_PATH=$PKG_CONFIG_PATH:/usr/local/lib/pkgconfig' | sudo tee --append ~/.bashrc
echo 'export PKG_CONFIG_PATH' | sudo tee --append ~/.bashrc
source ~/.bashrc
After that’s finished you should be able to use OpenCV with C++ and Python. Let’s do a quick check:
python3
import cv2
cv2.__version__
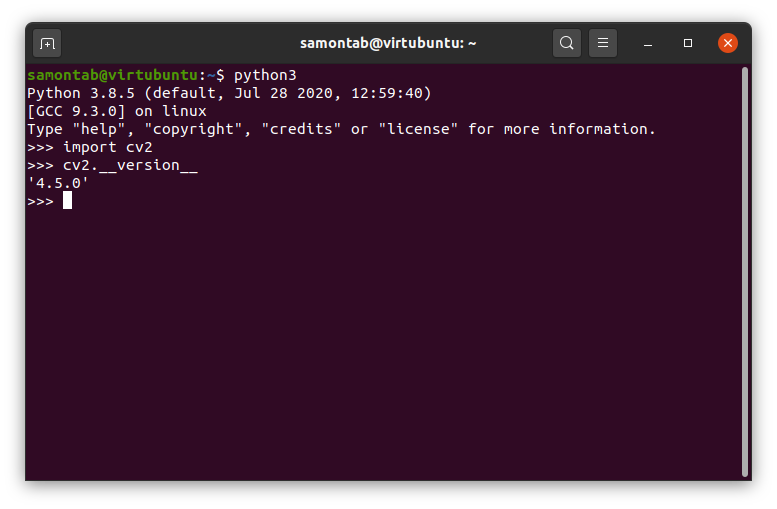
You should see no errors and 4.5.0 as the version.
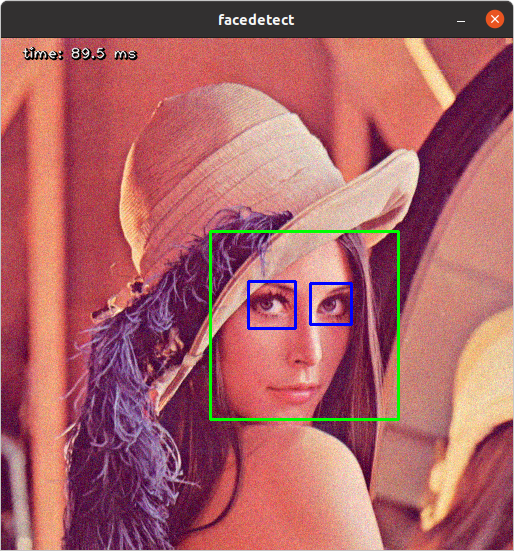
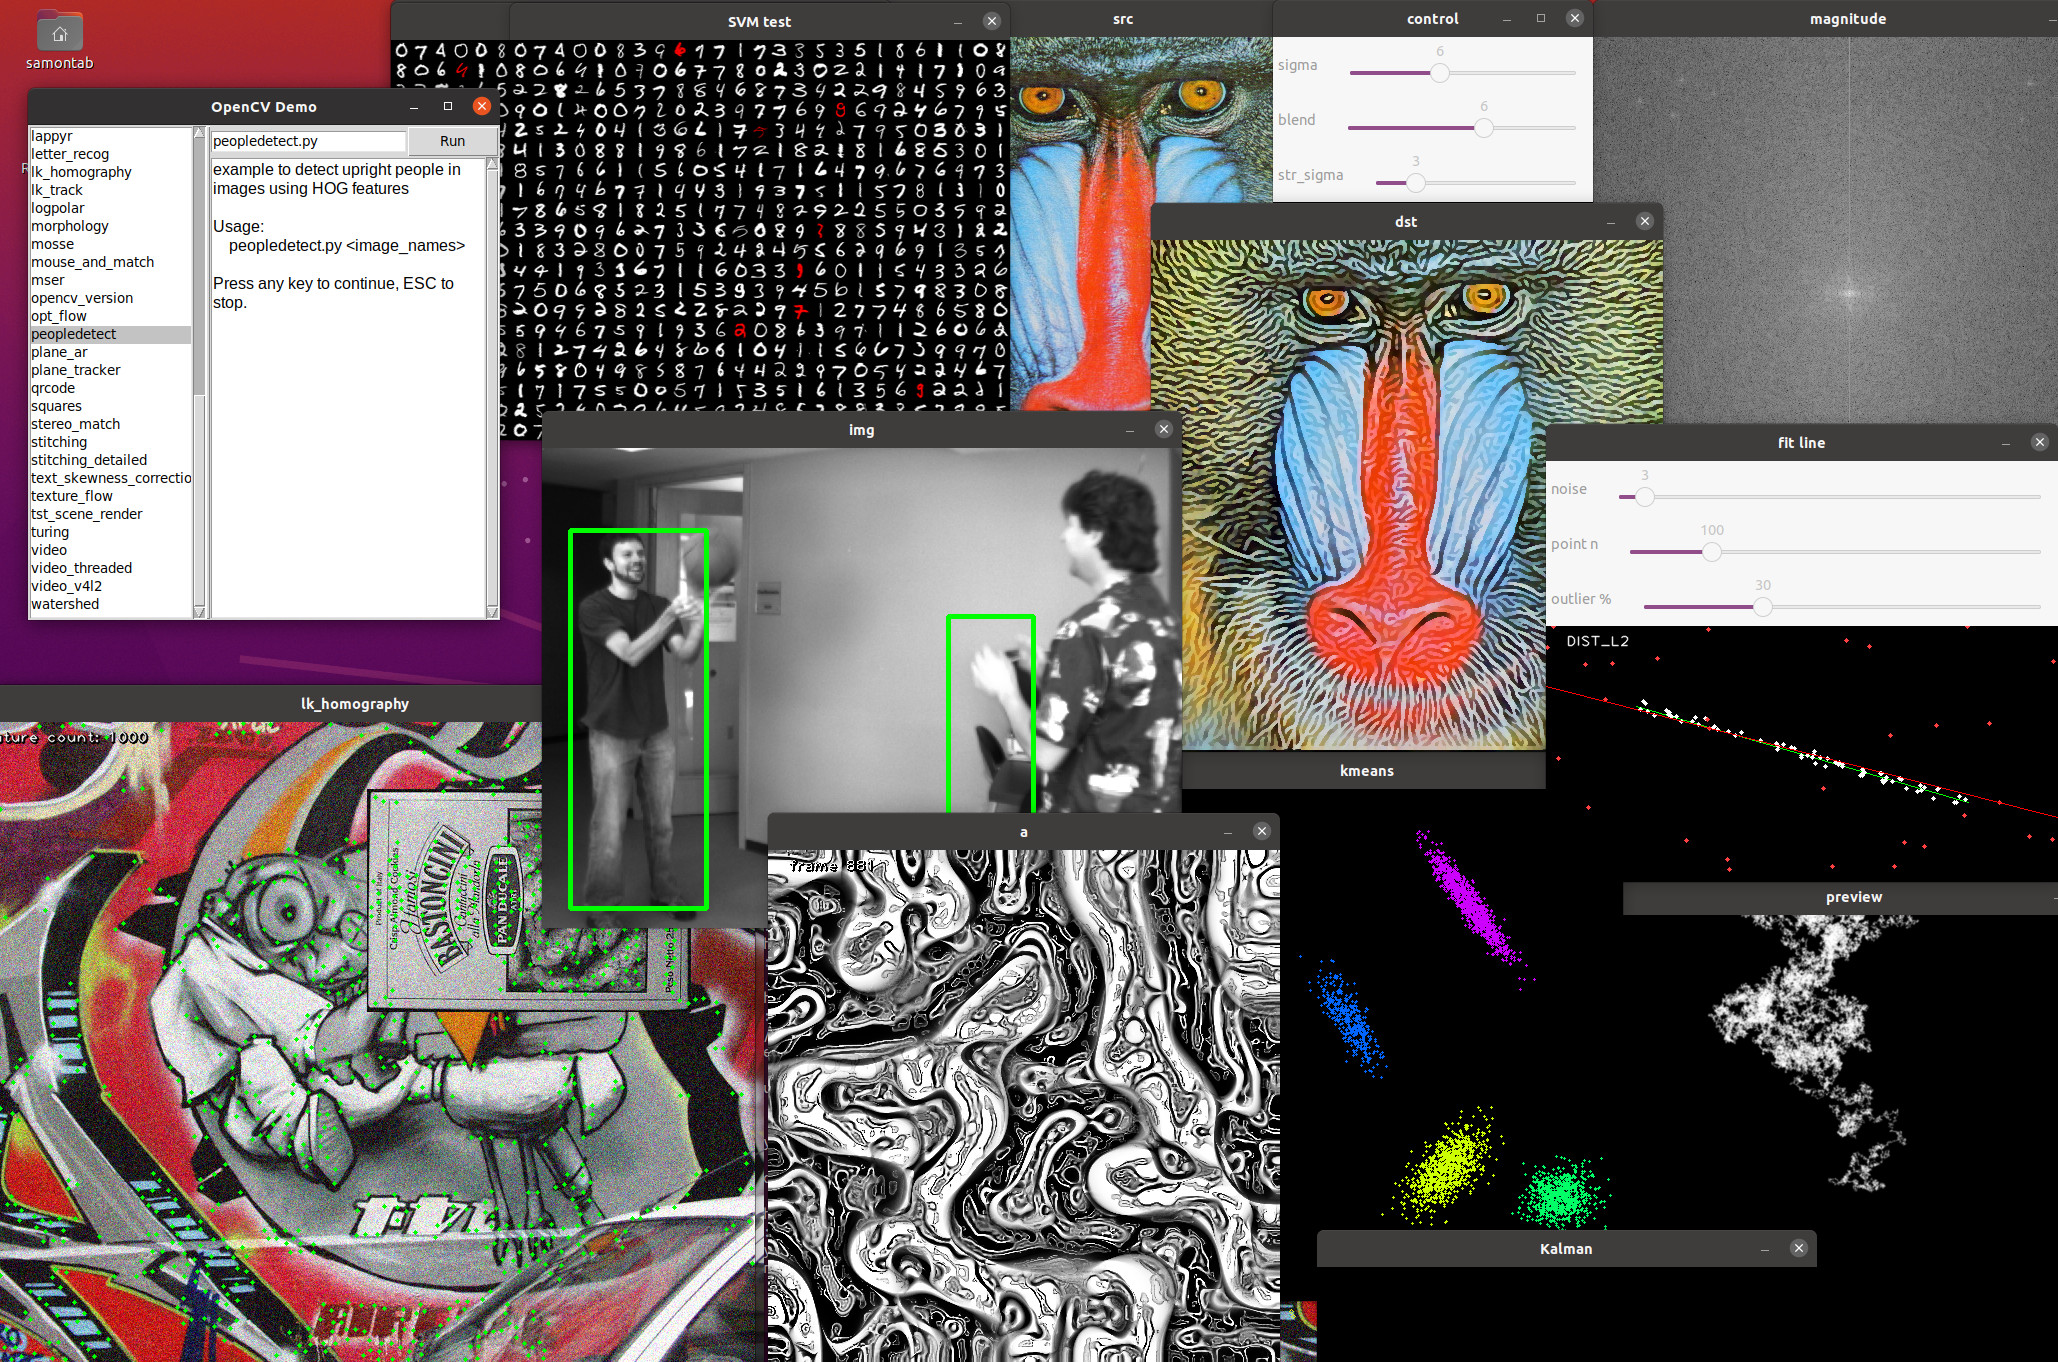
Now let’s run some Python demos. You can start all of them from a central place:
cd ~/opencv-4.5.0/samples/python
python3 demo.py
You can also execute any of the already compiled C++ demos. For example let’s run the intelligent scissors demo:
cd ~/opencv-4.5.0/build/bin
./example_cpp_intelligent_scissors
If you click on the image and move your mouse you’ll see that the selection moves to match the object edges. Once you are ready selecting the contour of the object press right click and the object will be selected.

Now you’ll learn how to compile an application that uses OpenCV with C++ using cmake. Let’s copy another example source code and prepare it for compilation.
cd ~
mkdir sample
cd sample
cp ~/opencv-4.5.0/samples/cpp/text_skewness_correction.cpp .
cp ~/opencv-4.5.0/samples/data/imageTextR.png .
Now we’re going to create a cmake file that will allow us to compile the sample. Create a text file called CMakeLists.txt and put this content in it:
cmake_minimum_required (VERSION 3.0.2)
project (text_skewness_correction)
find_package(OpenCV REQUIRED)
include_directories( ${OpenCV_INCLUDE_DIRS} )
add_executable (${PROJECT_NAME} text_skewness_correction.cpp)
target_link_libraries (${PROJECT_NAME} ${OpenCV_LIBS})
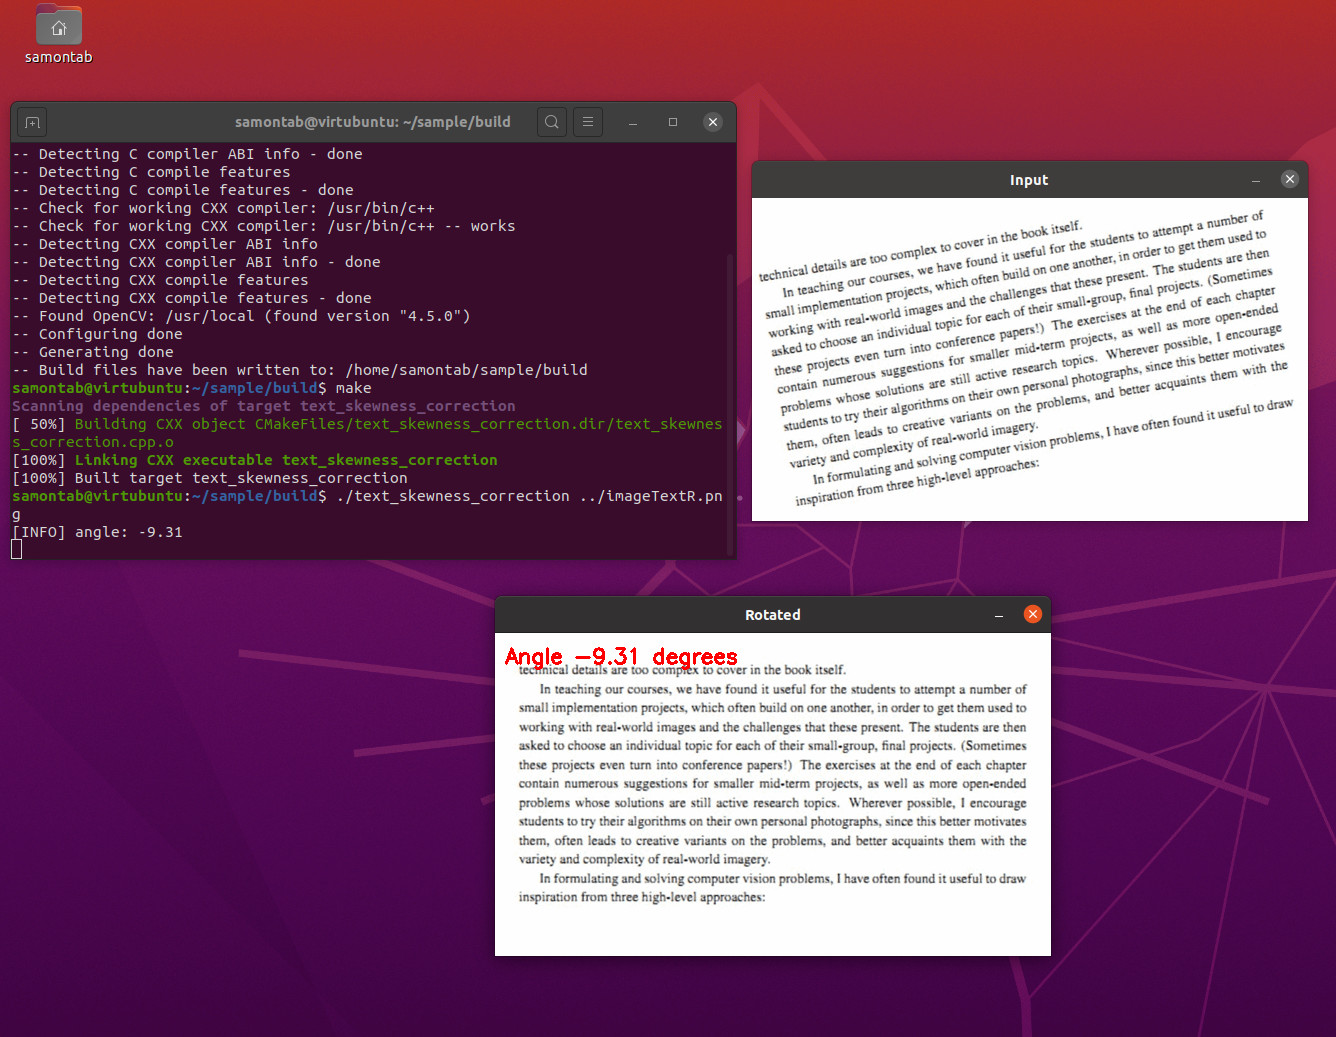
OK, now we’re ready to build it and run it:
mkdir build
cd build
cmake ..
make
./text_skewness_correction ../imageTextR.png
Now you have OpenCV 4.5.0 correctly installed in your Ubuntu 20.04 LTS system, and you know how to create applications using C++ and Python.


Does this work for you with opencv 3.2.0 too?
I tried your commands on ubuntu 20.04.2 LTS and git this Error after “make -j4”
“[ 16%] Generating precomp.hpp.gch/opencv_viz_Release.gch
In file included from /usr/include/c++/9/ext/string_conversions.h:41,
from /usr/include/c++/9/bits/basic_string.h:6493,
from /usr/include/c++/9/string:55,
from /usr/include/c++/9/stdexcept:39,
from /usr/include/c++/9/array:39,
from /usr/include/c++/9/tuple:39,
from /usr/include/c++/9/bits/stl_map.h:63,
from /usr/include/c++/9/map:61,
from /home/daniel/opencv-3.2.0/build/modules/viz/precomp.hpp:49:
/usr/include/c++/9/cstdlib:75:15: fatal error: stdlib.h: No such file or directory
75 | #include_next
| ^~~~~~~~~~
compilation terminated.
make[2]: *** [modules/viz/CMakeFiles/pch_Generate_opencv_viz.dir/build.make:64: modules/viz/precomp.hpp.gch/opencv_viz_Release.gch] Error 1
make[1]: *** [CMakeFiles/Makefile2:3721: modules/viz/CMakeFiles/pch_Generate_opencv_viz.dir/all] Error 2
make[1]: *** Waiting for unfinished jobs….
[ 16%] Built target pch_Generate_opencv_video
[ 16%] Built target pch_Generate_opencv_test_video
[ 16%] Built target pch_Generate_opencv_perf_video
make: *** [Makefile:163: all] Error 2”
Hi Daniel!
I’m trying to install opencv too. I have seen in other tutorials that this line (“make -j4”) could change in order to the number of cores of your processor. If you don’t know the number of cores of your processor, you can find it by typing “nproc”.
However, I get an error when I reach 35%.
“[ 35%] Building CXX object modules/videoio/CMakeFiles/opencv_videoio.dir/src/cap_dc1394_v2.cpp.o
/home/fernando/Descargas/opencv-4.5.0/modules/videoio/src/cap_dc1394_v2.cpp:59:10: fatal error: dc1394/dc1394.h: No such file or directory
59 | #include
| ^~~~~~~~~~~~~~~~~
compilation terminated.
make[2]: *** [modules/videoio/CMakeFiles/opencv_videoio.dir/build.make:180: modules/videoio/CMakeFiles/opencv_videoio.dir/src/cap_dc1394_v2.cpp.o] Error 1”
Hi Daniel,
Yes, these instructions should work for different versions of OpenCV. Probably a few lines might need some little changes to match the specifics of each version of OpenCV you’re using.
I did a tutorial for installing OpenCV 3.2.0 in Ubuntu 16.04, so check it out to see if it helps you:
https://www.samontab.com/web/2017/06/installing-opencv-3-2-0-with-contrib-modules-in-ubuntu-16-04-lts/
Hola Fernando,
TL;DR:
sudo apt-get install libdc1394-dev
The command make just starts the build, so it shouldn’t be related to any problems in the build.
About your error, the videoio module of OpenCV uses the dc1394 camera capture library, and it’s saying that it doesn’t find it in your machine (fatal error: dc1394/dc1394.h: No such file or directory).
In the instructions I added libdc1394-dev to be installed. It looks like you skipped that part.
If you’re still having build issues with this module, you can disable it with -DBUILD_opencv_videoio=OFF in the cmake command before the build.