UPDATE: You can also install OpenCV 3.2.0 in Ubuntu 16.04LTS.
OpenCV is an excellent library for Computer Vision. I have been using it for years and it helped me a lot during my master thesis.
OpenCV 1.0 can be easily installed in Ubuntu via the repositories. You can install OpenCV 2.0 by following one of my previous posts https://www.samontab.com/web/2010/03/installing-opencv-2-0-in-ubuntu/
Unfortunately, the newer version of OpenCV, 2.1, which was released on April has a slightly different installation procedure. Since it contains many bug fixes and some nice new additions, I will show you how to install it.
UPDATE: Install OpenCV 2.2 in Ubuntu 11.04 with Python and TBB support here.
Here are the steps that I used to successfully install OpenCV 2.1 in Ubuntu 9.10. I have used this procedure for previous versions of Ubuntu as well with minor modifications (if any).
First, you need to install many dependencies, such as support for reading and writing jpg files, movies, etc… This step is very easy, you only need to write the following command in the Terminal
sudo apt-get install build-essential libgtk2.0-dev libavcodec-dev libavformat-dev libjpeg62-dev libtiff4-dev cmake libswscale-dev libjasper-dev
The next step is to get the OpenCV 2.1 code:
cd ~
wget https://sourceforge.net/projects/opencvlibrary/files/opencv-unix/2.1/OpenCV-2.1.0.tar.bz2/download
tar -xvf OpenCV-2.1.0.tar.bz2
cd OpenCV-2.1.0/
In this version of OpenCV, the configure utility has been removed. Therefore you need to use Cmake to generate the makefile. Just execute the following line at the console. Note that there is a dot at the end of the line, it is an argument for the cmake program and it means current directory.
cmake .
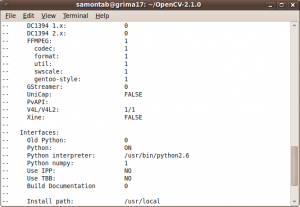
Check that the above command produces no error and that in particular it reports FFMPEG as 1. If this is not the case you will not be able to read or write videos.
Now, you are ready to compile and install OpenCV 2.1:
make
sudo make install
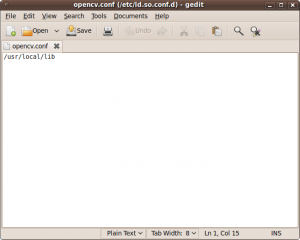
Now you have to configure the library. First, open the opencv.conf file with the following code:
sudo gedit /etc/ld.so.conf.d/opencv.conf
Add the following line at the end of the file(it may be an empty file, that is ok) and then save it:
/usr/local/lib
Run the following code to configure the library:
sudo ldconfig
Now you have to open another file:
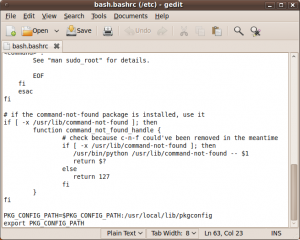
sudo gedit /etc/bash.bashrc
Add these two lines at the end of the file and save it:
PKG_CONFIG_PATH=$PKG_CONFIG_PATH:/usr/local/lib/pkgconfig
export PKG_CONFIG_PATH
Finally, open a new console, restart the computer or logout and then login again. OpenCV will not work correctly until you do this.
Now you have OpenCV 2.1 installed in your computer.
Let’s check some demos included in OpenCV:
cd ~
mkdir openCV_samples
cp OpenCV-2.1.0/samples/c/* openCV_samples
cd openCV_samples/
chmod +x build_all.sh
./build_all.sh
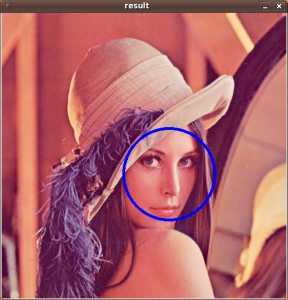
Some of the training data for object detection is stored in /usr/local/share/opencv/haarcascades. You need to tell OpenCV which training data to use. I will use one of the frontal face detectors available. Let’s find a face:
./facedetect --cascade="/usr/local/share/opencv/haarcascades/haarcascade_frontalface_alt.xml" --scale=1.5 lena.jpg
Note the scale parameter. It allows you to increase or decrease the size of the smallest object found in the image (faces in this case). Smaller numbers allows OpenCV to find smaller faces, which may lead to increasing the number of false detections. Also, the computation time needed gets larger when searching for smaller objects.
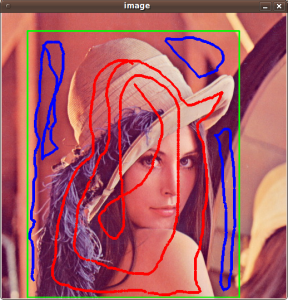
In OpenCV 2.1, the grabcut algorithm is provided in the samples. This is a very nice segmentation algorithm that needs very little user input to segment the objects in the image. For using the demo, you need to select a rectangle of the area you want to segment. Then, hold the Control key and left click to select the background (in Blue). After that, hold the Shift key and left click to select the foreground (in Red). Then press the n key to generate the segmentation. You can press n again to continue to the next iteration of the algorithm.
./grabcut lena.jpg
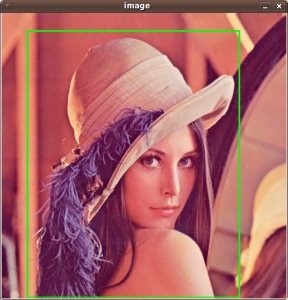
This image shows the initial rectangle for defining the object that I want to segment.
Now I roughly set the foreground (red) and background (blue).
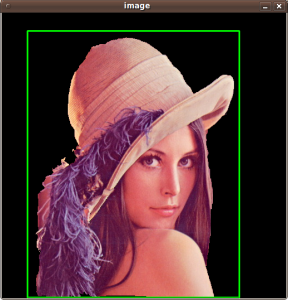
When you are ready, press the n key to run the grabcut algorithm. This image shows the result of the first iteration of the algorithm.
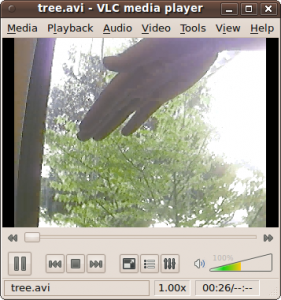
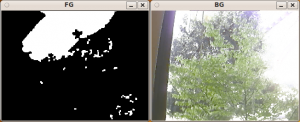
Now let’s see some background subtraction from a video. The original video shows a hand moving in front of some trees. OpenCV allows you to separate the foreground (hand) from the background (trees).
./bgfg_segm tree.avi
There are many other samples that you can try.



Very nice tutorial, I am also fighting with the instalation of opencv 2.1. I think that it is essential in this version to get tbb to work.
I installed libtbb2 and libtbb-dev from ubuntu 10.04, as sugested in the installation guide of opencv, but when I run:
cmake -D:USE_TBB=ON .
I get:
– Interfaces:
— Old Python: 0
— Python: ON
— Python interpreter: /usr/bin/python2.6
— Python numpy: 0
— Use IPP: NO
— Use TBB: NO
— Build Documentation 0
Any ideas??
Hi Alberto,
I had the same problem. The documentation is incorrect. Use the flag -D:WITH_TBB=ON instead, and it will work.
AJ
Thanks for your response but still does not work, I think that I will wait until I get ubuntu 10.04,
Currently my settings are:
-Ubuntu 9.10
– And these libraries obtained
from ubuntu 10.04 repositories
ii libtbb-dev 2.2+r009-1
ii libtbb2 2.2+r009-1
– The command I use is
cmake -D:WITH_TBB=ON .
But still no luck
What if FFMPEG is not listed as 1?How do we correct that?Or what is possibly wrong with the system?
@Alberto, I have the same problem. under 9.10. Maybe it is easier to wait for 10.04.
@sreevani, it means that the FFMPEG libraries are not being recongized by the Opencv installer. This may be because they are installed into a different location, not the default one. Try re installing FFMPEG, which is the first step in the tutorial. Also, this may be because you are running a different version of Ubuntu. In some cases you need to build FFMPEG manually, downloading the code from the svn repository.
ok got the answer.I missed out on a package needed therefore was not getting the 1 on FFMPEG.
Your tutorial was excellent.I can add to it though with the innocent mistakes I committed!!Excellent post man!!
@alberto
$ sudo aptitude install libtbb-dev
$ cmake -D WITH_TBB=YES .
wonderful post..Thanks
Awesome, thank you ;)
i’ve made ubuntu packages for opencv 2.1:
http://gijs.pythonic.nl/blog/2010/apr/7/opencv-21-ubuntu-packages/
Thanks :)
if you want use python interface, you should use: cmake -D BUILD_PYTHON_SUPPORT=ON .
damn good tutorial
thanx
Thanku very much for an awesome tutorial..u made life easier
Thanks for an awesome tutorial, just with some little tweaks I got this to work for lucid :) oh and I took your tutorial and made a script out of it, so the users can just execute the script and won’t have to worry about doing anything manually, are you interested in that script, you can attach it to your tutorial. Email me if you would like to see the script :)
Your tutorial is simply awesome,thank u so much, my hat´s off
Thank you v much for this post . It was really useful to me , to get myself un-stuck from something I’d been battling for hours.
The tutorial was great with one exception. When I build, it doesn’t seem to support OpenMP. When I build with Windows it does. What do I need to do to enable the multi-threading support?
after running the bgfg_segm program i am getting this error..
[swscaler @ 0x84d79a0]No accelerated colorspace conversion found.
the output is not getting displayed.. Please help me..
chandan, that seems to me that your opencv installation is not properly configured for reading videos. Go through the installing steps again and make sure that FFMPEG is listed as 1 before compiling.
i installed ffmpeg again and now though i am able to read video files the same message is getting displayed..is it some kind of a bug in ffmpeg?
Hi,
I installed OpenCV-2.1.0 on my Ubuntu 10.04, Lucid and at first everything worked fine.
No errors, everything ok. I followed this tutorial an compiled all the examples of openCV and even that worked. Then I wanted to run the first example “facedetect”.
As I clicked return I only got this terminal window message: ” Illegal instruction ”
I had the OpenCV-2.0 running on Ubuntu 9.10 before and I never saw this Message.
Does anybody know what this means or what the problem is? My Ubuntu is totally new, so I install only the things needed for OpenCV.
Is it a problem that I’am using a AMD processor while openCV is made for Intel?
Thanks in advance.
Thank you so much! This article is Very useful!
merci
I was having the same problem to get tbb working in opencv.
I solved installing tbb in this way:
sudo apt-get install libtbb-dev
To obtain tbb support, I used:
cmake -D CMAKE_BUILD_TYPE=RELEASE -D CMAKE_INSTALL_PREFIX=/usr/local -D BUILD_PYTHON_SUPPORT=ON -D WITH_TBB=ON ..
Cheers!!
thanks boss!
Greetings, Sebastian!
I’m a student of computer engineering from Brazil and I’d like to thank you for this tutorial. It helped me a lot and It’s very clear! I’ll recommend it to other friends of mine!
See ya!
Thanks!, I am glad that it helped you…
Good luck with your projects!
Hy, just to shared with you guys (maybe it helps some one):
I had this problem that in the make progress that returned:
Linking CXX shared library ../../lib/libhighgui.so
/usr/bin/ld: cannto find -lbz2
collect2: ld returned 1 exit status
make[2]: ** [lib/libhighgui.so.2.1.0] Erro 1
make[1]: ** [src/highgui/CMakeFiles/highgui.dir/all] Erro 2
make: ** [all] Erro 2
And i simple resolve installing the libbz2-dev package.
So just : apt-get install libbz2-dev as root
and re-make the OpenCv again…
That should do it !!
Hope it helps some one!
xD
Thank you very much for that great tutorial!! The installation guide you described worked perfectly!
Now, I try to include TBB and IPP to speed up my code. But when I use cmake it fails to detect them (eg. USE IPP: NO) …any suggestions? THANK YOU!
My setup: ubuntu 10.04, opencv 2.1 (Core i5)
PS: I used this command:
cmake -D:WITH_TBB=ON -D:USE_IPP=ON -D:IPP_PATH=/opt/intel/ipp/6.1.2.051/em64t/sharedlib
thank you ….why don’t we need ./configure before make as in previous version
Hi cht,
The ./configure script was removed in version 2.1. It was replaced by cmake, which is a cross-platform solution. As you can see, instead of writing ./configure you need to run cmake .
Thank you very much for the tutorial.
I have a Logitech Quickcam Express webcam. I am unable to use it in live mode with OpenCV. I am using Ubuntu 10.10. I got the same output (as in the picture) on running “cmake .” in step 2. Am I missing something?
I followed these clear instructions and built apparently successfully. I also get the “swscaler @ 0xbfa410]No accelerated colorspace conversion found.” error as mentioned above by chandan when trying the bgfg_segm tree.avi example. All the lena examples worked fine.
But, what is a showstopper for me is example ch2_ex2_9.cpp from the Learning OpenCV book — video capture performance is totally unusable. The ch2_ex2_2.cpp playing from a file instead of /dev/video0 works OK compared to playing back the file in Totem, vlc, and Xine. My capture card works fine in vlc, TVtime, and gstreamer.
Anyone have success with using live vfl2 video with openCV on 64-bit Ubuntu 10.04?
With little difficulty I reached till FFMPEG being listed as 1.
But I receive the following error while make
Linking CXX shared library ../../lib/libhighgui.so
/usr/bin/ld: /usr/local/lib/libavcodec.a(avpacket.o): relocation R_X86_64_32S against `av_destruct_packet_nofree’ can not be used when making a shared object; recompile with -fPIC
/usr/local/lib/libavcodec.a: could not read symbols: Bad value
collect2: ld returned 1 exit status
make[2]: *** [lib/libhighgui.so.2.1.0] Error 1
make[1]: *** [src/highgui/CMakeFiles/highgui.dir/all] Error 2
make: *** [all] Error 2
I am a beginner in Ubuntu/Linux and have no idea how to proceed further.
Hoping to receive some help. :)
Awesome stuff, this works on Ubuntu 10.10 with OpenCV 2.2. Many thanks!
i installed opencv2.2 recently using the instructions here. But i am unable to get python interface working. i used cmake -D BUILD_PYTHON_SUPPORT=ON . but there is no cv.so file in /usr/local/lib/python2.6/site-packages directory. Please help.
Also i got the following error after cmake,
(missing: PYTHON_INCLUDE_DIRS)
— Use INCLUDE: /usr/lib/python2.6/dist-packages/numpy/core/include
Thanks! This helped me install OpenCV 2.2 on Ubuntu 10.10
Alright..i got it working..the python headers can be installed in ubuntu by using
sudo apt-get python-dev
then the cmake process repeats.
then i copied the cv,so generated in /usr/local/lib/python2.6/site-packages to /usr/lib/python2.6/dist-packages..
now i can use python interface..
Hi all
When I installed OpenCV on ubuntu, I have a error when I tested demo with OpenCV on ubuntu. That error is :
hop@ubuntu:~/android/openCV_samples$ ./facedetect –cascade=”/usr/local/share/opencv/haarcascades/haarcascade_frontalface_alt.xml” –scale=1.5 lena.jpg
OpenCV Error: Unspecified error (The function is not implemented. Rebuild the library with Windows, GTK+ 2.x or Carbon support. If you are on Ubuntu or Debian, install libgtk2.0-dev and pkg-config, then re-run cmake or configure script) in cvNamedWindow, file /home/hop/android/opencv/OpenCV-2.2.0/modules/highgui/src/window.cpp, line 274
terminate called after throwing an instance of ‘cv::Exception’
what(): /home/hop/android/opencv/OpenCV-2.2.0/modules/highgui/src/window.cpp:274: error: (-2) The function is not implemented. Rebuild the library with Windows, GTK+ 2.x or Carbon support. If you are on Ubuntu or Debian, install libgtk2.0-dev and pkg-config, then re-run cmake or configure script in function cvNamedWindow
Aborted
can you show me why I have that error and what i have to do. Thanks.
Hi,
It seems that you don’t have any graphical libraries correctly installed on that machine (i.e. libgtk2.0-dev). The example that you run shows the image of Lena with her face detected, but because you don’t have any graphics library installed, you can’t draw anything on the screen and therefore the error shows up.
The library that you need to install is libgtk2.0-dev, which is installed at the beginning of this tutorial. Try re installing OpenCV carefully following the instructions in this post (just copy and paste the code) and it should work.
Best Regards,
Sebastian Montabone
Thanks for your reply. When I did the command : hop@ubuntu:~/OpenCV-2.1.0$ cmake .
it generates some errors such as :
[ 82%] Building CXX object apps/haartraining/CMakeFiles/cvhaartraining.dir/cvsamples.o
/home/hop/OpenCV-2.1.0/apps/haartraining/cvsamples.cpp: In function ‘void cvShowVecSamples(const char*, int, int, double)’:
/home/hop/OpenCV-2.1.0/apps/haartraining/cvsamples.cpp:887: warning: ignoring return value of ‘size_t fread(void*, size_t, size_t, FILE*)’, declared with attribute warn_unused_result
/home/hop/OpenCV-2.1.0/apps/haartraining/cvsamples.cpp:888: warning: ignoring return value of ‘size_t fread(void*, size_t, size_t, FILE*)’, declared with attribute warn_unused_result
/home/hop/OpenCV-2.1.0/apps/haartraining/cvsamples.cpp:889: warning: ignoring return value of ‘size_t fread(void*, size_t, size_t, FILE*)’, declared with attribute warn_unused_result
/home/hop/OpenCV-2.1.0/apps/haartraining/cvsamples.cpp:890: warning: ignoring return value of ‘size_t fread(void*, size_t, size_t, FILE*)’, declared with attribute warn_unused_result
Am I missing something?
I need to install OpenCV on Ubuntu to execute face detection in Android .
Hi TranDang…
I don’t see any errors in the code you posted. Those are just warnings. If the command “cmake .” does not produce a Makefile, then there are some errors. If they are just warnings, ignore them and continue with the procedure. (The next step is to write the make command)
Hi Samontab,
Thanks for the help. I have installed OpenCV on Ubuntu. Now I have to test OpenCV in Android with face recognition using Java. So I want to know does the library for face recognition in OpenCV installed in my PC? And what command I have to do to test it?
If you have any resource and documents for test OpenCV in android. Could you send them to me?. Thanks again.
Thanks chandan for posting your solution! I had the same problem (no cv.so file in /usr/local/lib/python2.6/site-packages/ ) using: Ubuntu 10.10 OpenCV 2.2 and Python 2.6
Installing python-dev and reinstalling OpenCV fixed everything!
Thank you for the clear steps to install OpenCV 2.1. A bit more of explanation about the steps would be great. Thanks again!
Thanks for the post…Initially I got an error saying “No package ‘opencv’ found”. I again followed the same steps and solved my problem
Hey, Thanks for the tutorial. I followed all the steps you mentioned, but the problem I am facing is that, OpenCV is not loading jpeg images and avi files. However it is able to load png/tiff files. I am using Ubuntu 10.10 (64 bit). Any help regarding this would be appreciated.
Thanks.
OpenCV uses external libraries for reading and writing those types of files. Make sure that you install all the libraries in the first step of the tutorial. For example, libjpeg62-dev allows you to work with jpg files. It may be that for your particular distribution you may need different libraries. After you issue the cmake command, a summary of the current configuration should appear. Check that all the functionality that you require is installed (FFMPEG is reported as 1, as well as JPG, etc…). If any of those are shown as 0, go back and install the correct libraries and run cmake again. Once everything is OK in that configuration you can continue and install OpenCV.
Hi, first off thanks for the tutorial.
When I installed OpenCV 2.1 though I got the “No accelerated colorspace conversion found from yuv420p ….” error when trying the example in this guide (or any other).
I tried to follow the guide here:
http://alexsleat.co.uk/2011/01/09/how-to-fix-no-accelerated-colorspace-conversion-found-from-yuv420p-to-bgr24-opencv-2-2-0-ubuntu-10-10/
But that didn’t fix it either.
However when I followed the guide via alexleat and installed OpenCV 2.2 it did all work. (Although the bgfg_segm example isn’t there anymore.)
Is there any reason this guide isn’t updated to OpenCV 2.2 yet? (Which just means changing OpenCV-2.1.0 to OpenCV-2.2.0.)
Hi Maarten,
The reason why this guide is not updated to OpenCV 2.2 yet is because the basic installation process is very similar in 2.1 and 2.2….
Although, OpenCV 2.2 is a great release and incorporates many new features such as support for android, gpu acceleration, a new framework for 2d features, etc. Because of these features, I might release an updated guide showcasing them… but I don’t know if I’ll have time to write it before they release the next version….
This method breaks my Ubuntu install every time. After doing this being it basically makes it so the login window (the one where you pick your user ID) no longer loads after the first reboot. I had to reinstall ubuntu twice because of this.
Thank u very much, helped me install, with the help of another site though “linuxconfig.org”
I installed with the help of your blog and since it was too good, I shared your link in my blog, with some suggestions, here’s the link for it
http://opencvuser.blogspot.com/2011/06/installing-opencv.html
I’ve been beating my head against the wall of “OpenCV is so simple to install” for about two weeks now.
I tried version 2.2….can’t get through the make without errors.
I tried the SVN “bleeding edge version”…same problem
Now I find your website, saying “OpenCV 2.1 is so easy to install”
I’m using Ubuntu 11.04 and following your directions precisely.
the make command halts here:
Linking C static library ../lib/libopencv_lapack.a
[ 42%] Built target opencv_lapack
[ 42%] Building CXX object src/cxcore/CMakeFiles/cxcore_pch_dephelp.dir/cxcore_pch_dephelp.o
/root/Desktop/OpenCV-2.1.0/OpenCV-2.1.0/src/cxcore/cxcore_pch_dephelp.cxx:1:72: error: one or more PCH files were found, but they were invalid
/root/Desktop/OpenCV-2.1.0/OpenCV-2.1.0/src/cxcore/cxcore_pch_dephelp.cxx:1:72: error: use -Winvalid-pch for more information
/root/Desktop/OpenCV-2.1.0/OpenCV-2.1.0/src/cxcore/cxcore_pch_dephelp.cxx:1:72: fatal error: /root/Desktop/OpenCV-2.1.0/OpenCV-2.1.0/src/cxcore/_cxcore.h: No such file or directory
compilation terminated.
make[2]: *** [src/cxcore/CMakeFiles/cxcore_pch_dephelp.dir/cxcore_pch_dephelp.o] Error 1
make[1]: *** [src/cxcore/CMakeFiles/cxcore_pch_dephelp.dir/all] Error 2
make: *** [all] Error 2
I’ve been using cmake -i for an interactive setup, but I’m only guessing at many of the
proper options to specify.
your use of “cmake .” is a new experience for me, but it doesn’t seem to solve
any of the problems I’m having.
What is the bare minumum I need to get the OpenCV installed and working?
I intend to use Python to work with these libraries…but first I have to get past this
maddening hurdle.
Am I going to have to become a computer science major to be smart enough to simply install the program, let alone use it?
Please Please PLEASE I hope you can provide better guidance than I’ve gotten in numerous other places.
@dexter
Well, this guide was written for Ubuntu 9.10 and OpenCV 2.1. Since you are working with Ubuntu 11.04, maybe some steps are a little different. It shouldn’t be very difficult to adapt these instructions to make it work in 11.04, but if you are really desperate, try installing Ubuntu 9.10, and follow these instructions carefully step by step to install OpenCV 2.1. You shouldn’t have a problem. Actually I think 10.04 should work as well.
Also, note that you actually did not follow the instructions precisely because you are under the root user and you downloaded the code into the desktop, and my instructions say to download the code into the user directory… maybe try again following my instructions more precisely :)
All right. I tried it your way, from a non root login. Still getting errors. I’ve got a text file with all the miles and miles of warnings and errors. Care to have a look?
I have no idea what to do now. I could really use some help.
OK Dexter, I just published a post about installing OpenCV 2.2 in Ubuntu 11.04 from scratch. Take a look here:
http://www.samontab.com/web/2011/06/installing-opencv-2-2-in-ubuntu-11-04/
Follow the instructions step by step and you should have no problems.
Excellent tutorial! I’m installing OpenCV 2.1 in Ubuntu 10.04 and everything works in 64 bit. However, in 32 bit, I’m getting an error which I think may be related to this issue, https://bugs.launchpad.net/ubuntu/+source/opencv/+bug/663639. Their resolution is to recompile OpenCV with OpenCV’s lapack rather than defaulting to Ubuntu’s. Can you give instructions on how to do so? Or other ideas on this issue? Many thanks.
I haven’t tested this, but you can tell OpenCV that you want to compile with the internal lapack at the cmake step:
cmake -D BUILD_LAPACK=ON .
If that doesn’t work, you can always build the library yourself:
cd OpenCV-2.1.0/3rdparty/lapack/
cmake .
make
That will produce the library libopencv_lapack.a in the OpenCV-2.1.0/3rdparty/lapack/3rdparty/lib folder.
You can then compile your program with that library:
g++ main.cpp -LOpenCV-2.1.0/3rdparty/lapack/3rdparty/lib -lopencv_lapack
That should always work…
Thank you for the tutorial, I successfully installed OpenCV 2.1 and was able to do also the tutorials. I was wondering if I could do image processing using real time camera and make it control a system if ever the camera detect someone. I’m doing this for my thesis and I am hoping someone could help me on this. Thanks.
Sure you can…
You have to design the system first. It depends on many things, for example the field of view of the camera. The more controlled the environment is, the easier it is to detect people. You have to define what a person is in your system, a frontal face, a full profile view of the person, bird’s eye view, etc… What lens should you use?, prime?, variable focal length?, telephoto, wide angle?… do you need pan and tilt too?. Also, is this system going to detect a lot of people, or a few at the same time, what about occlusion?. Is the camera going to move, or not? what about the background?, does it interfere with your foreground?, does it change constantly?… is it indoor or outdoor?… can you use other sensors?, maybe stereo cameras?, lasers?, kinect? what about a movement sensor?… sometimes it is better to use other technology… remember that computers aren’t as good as humans in image processing, but given some constraints, some interesting stuff can be made… so… yes, you can detect people using OpenCV, but you have to be a little more specific than just that :)
Sebastian,
Thank for this great post!
So there isn’t a way to make OpenCV2.1 to work in Ubuntu11.04? Really need this version of OpenCV2.1 on Ubuntu 11.04 since version 2.2 doesn’t support by one of my other toolkit?
Yes, I have installed it on 11.04 before.
Try following the 2.1 tutorial, it should work OK with minor adjustments, if any. If you run into any trouble, ask in the comments…
Thanks! You saved my day!
I’m glad I could help
ur tutorial is great!! I tried a lot of other methods, which can not work. This is really helpful.. Thanks a lot
This is fantastic blog.
Thank you, I successfully installed OpenCV 2.1 :-D
thank you very much for this,
but i’ve a problem i wish you can help me solving it.
i have written my own program that uses cv.h and highgui.h program
but when i compile it i got huge errors like:
undefined reference to cvFree and somethings like that
i’ve follow all your step but when i try sudo ldconfig it outputs command not found
and then i switch to root by su and try ldconfig i get no output
so if u can help me on that i will appreciate it
Shazly, maybe you are running a different linux distro, or another version of Ubuntu because ldconfig should be available in your path in Ubuntu, but in your case it isn’t.
You can run it using the full path, for example:
sudo /sbin/ldconfigIf that doesn’t work, search where it is in your machine with one of these commands:
whereis ldconfigor
locate ldconfigAny of those codes should give you the correct location of ldconfig in your machine. Replace /sbin/ldconfig with the correct path and you should be good to go.
Hi,
Im getting an error with the reports for FFMPEG, when i run cmake . i got 0 for FFMPEG, How can i solve it? Please i really use some help
Thanks for your time
gracias me sirvio mucho, ahora estoy :) con opencv, me metere de lleno a programar
which compiler did you use for python and opencv?
I do not use any compiler for Python. For C++ (OpenCV) I use gcc.
Hi
I know its been a while since the last post on this thread, but still here goes.
I a trying to use OpenCV along with another piece of code (that I have not written). ffmpeg and boost libraries are also required which I have installed.
When I run the make script for the code, I get errors of the form
“ld: -lcv not found”
when I execute pkg-config –libs opencv I get the output
-L/usr/local/lib -lopencv_core -lopencv_imgproc -lopencv_highgui -lopencv_ml -lopencv_video -lopencv_features2d -lopencv_calib3d -lopencv_objdetect -lopencv_contrib -lopencv_legacy -lopencv_flann
Could you please tell me what is going wrong?
I have been breaking my head over this for almost a week now.
OpenCV changed how to include its libraries. That is why -lcv is not found anymore, it was used in previous versions of OpenCV.
You have to change the make script for your code to make it compatible with this and newer versions of OpenCV.
You should always use pkg-config to make your programs instead of hard coding the libraries (I guess -lcv is hardcoded in your make script, or if not, then there may be other OpenCV installations)
For example, if you have a source code in the file MyFile.cpp and you are using OpenCV in it, you should compile it this way:
g++ `pkg-config --cflags --libs opencv` -o MyApp MyFile.cppThat way, the libraries are included correctly. It does not matter if you have an older or newer version of OpenCV libraries with that compilation line, because it gets the correct linking every time given that pkg-config is correctly configured.
Change your make script to include pkg-config instead of hardocded libraries and it should work.
If you need them in separate places, here it is:
This line will give you the includes:
`pkg-config --cflags opencv`This line will give you the libraries and their paths:
`pkg-config --libs opencv`Thank you so much
I know nothing at Ubuntu but needed to install it, and this line by line step was just perfect. It worked from the first try!
what is the function of changing opencv.conf?
In opencv.conf you set the location of the OpenCV library so that the system can find it.
The sudo ldconfig command updates the system libraries with the ones defined in those files.
i got this output when i compiled my code ..pls help about this problem
gcc: pkg-config –cflags opencv: No such file or directory
gcc: pkg-config –libs opencv: No such file or directory
imagecapturing.c:1:20: error: highgui.h: No such file or directory
imagecapturing.c: In function ‘main’:
imagecapturing.c:9: error: ‘CV_WINDOW_AUTOSIZE’ undeclared (first use in this function)
imagecapturing.c:9: error: (Each undeclared identifier is reported only once
imagecapturing.c:9: error: for each function it appears in.)
imagecapturing.c:11: error: ‘CvCapture’ undeclared (first use in this function)
imagecapturing.c:11: error: ‘capture’ undeclared (first use in this function)
imagecapturing.c:13: error: ‘IplImage’ undeclared (first use in this function)
imagecapturing.c:13: error: ‘IplImage1’ undeclared (first use in this function)
I have the following error for Ubuntu 12.04
The following packages have unmet dependencies:
libjpeg-turbo8-dev : Conflicts: libjpeg62-dev but 6b1-2ubuntu1 is to be installed
E: Error, pkgProblemResolver::Resolve generated breaks, this may be caused by held packages.
Hi Sebastian Montabone i am working on the project for the image contrast enhancement of a program on mini2440,i have configured opencv with cmake as you hav explained , but i cant cross compile with arm-linux-gcc (for target sys) and i can only compile with gcc and run on my host ubuntu 10.04 , but i have to make it run on my mini2440 friendly arm.
please help me .
thank you
renchris
Hello renchris,
I detailed the instructions to compile OpenCV for Ubuntu, which is a Linux distribution. This means that it already comes with a pre defined list of libraries and applications. That way, I know where to start.
In your case, you want to compile OpenCV for a mini2440, which is a custom hardware, capable of running different Linux distributions, but not Ubuntu it seems (http://www.andahammer.com/faq/). This means that you may need other libraries or configurations depending on the specific Linux distribution that you are using.
Because of that, I can’t provide you with detailed instructions but the overall process should be similar. Basically, first you need to install all the dependencies needed, then configure it, and finally compile the source code.
I hope it helps…
Ubuntu 12.04 is still not released so it seems that you are using a beta version. I strongly suggest you not to install OpenCV (or any other programming library for that matter) in a beta OS. That way you can save a lot of unnecessary headaches in the long term.
For solving your problem, for each library needed try to search the current version in your system and use that library instead. You can do that by using the search functionality of aptitude, for example:
apt-cache search libjpeg
Then, you can just replace the old library with the new one from my instructions, and it should work.
Errors from line 3 onwards are caused because opencv libraries are not included properly.
And the first two lines show that there is something wrong with pkg-config, which is needed to include the library, explaining the problem.
Try executing the following command:
pkg-config --cflags opencvYou should get something like this:
-I/usr/local/include/opencv -I/usr/local/includeAlso, execute this:
pkg-config --libs opencvYou should get something like this:
-L/usr/local/lib -lopencv_core -lopencv_imgproc -lopencv_highgui -lopencv_ml -lopencv_video -lopencv_features2d -lopencv_calib3d -lopencv_objdetect -lopencv_contrib -lopencv_legacy -lopencv_flannIf those commands work OK, then your makefile (or compile script) is wrong.
If they do not work, then pkg-config is not installed correctly. Please follow the instructions in this post carefully and you should solve your problem.
samontab thank you for the reply i ll see to that i have all the lib for my system as you have mentioned :)
class cv::OneWayDescriptorBase’ has no member named ‘GetPCADimHigh
how tosolve this error when running sudo ./build_all.sh
Try following the instructions one by one correctly.
If the problem still persists, tell me exactly what you did.
To install OpenCV using the terminal on Ubuntu:
$ su –
# apt-get update
# apt-get install build-essential
# apt-get install libavformat-dev
# apt-get install x264 v4l-utils ffmpeg
# apt-get install libcv2.3 libcvaux2.3 libhighgui2.3 python-opencv opencv-doc libcv-dev libcvaux-dev libhighgui-dev
http://namhuy.net/1205/how-to-install-opencv-on-ubuntu.html
Hi Stephanie,
That is the preferred way of installing OpenCV. But, if you need some feature of a newer version of OpenCV, or any customization, you will need to build it from source, and that process is described here.
Hi..
I get this following error.. Anyone know how to fix it..?
[ 45%] Building CXX object src/cxcore/CMakeFiles/cxcore_pch_dephelp.dir/cxcore_pch_dephelp.o
In file included from /home/michael/Downloads/open cv/OpenCV-2.1.0/include/opencv/cxcore.h:1826:0,
from /home/michael/Downloads/open cv/OpenCV-2.1.0/src/cxcore/_cxcore.h:51,
from /home/michael/Downloads/open cv/OpenCV-2.1.0/release/src/cxcore/cxcore_pch_dephelp.cxx:1:
/home/michael/Downloads/open cv/OpenCV-2.1.0/include/opencv/cxcore.hpp:177:13: error: ‘ptrdiff_t’ does not name a type
In file included from /home/michael/Downloads/open cv/OpenCV-2.1.0/include/opencv/cxcore.hpp:2307:0,
from /home/michael/Downloads/open cv/OpenCV-2.1.0/include/opencv/cxcore.h:1826,
from /home/michael/Downloads/open cv/OpenCV-2.1.0/src/cxcore/_cxcore.h:51,
from /home/michael/Downloads/open cv/OpenCV-2.1.0/release/src/cxcore/cxcore_pch_dephelp.cxx:1:
/home/michael/Downloads/open cv/OpenCV-2.1.0/include/opencv/cxoperations.hpp:2043:15: error: ‘ptrdiff_t’ does not name a type
/home/michael/Downloads/open cv/OpenCV-2.1.0/include/opencv/cxoperations.hpp:2591:31: error: ‘ptrdiff_t’ does not name a type
In file included from /home/michael/Downloads/open cv/OpenCV-2.1.0/include/opencv/cxcore.hpp:2308:0,
from /home/michael/Downloads/open cv/OpenCV-2.1.0/include/opencv/cxcore.h:1826,
from /home/michael/Downloads/open cv/OpenCV-2.1.0/src/cxcore/_cxcore.h:51,
from /home/michael/Downloads/open cv/OpenCV-2.1.0/release/src/cxcore/cxcore_pch_dephelp.cxx:1:
/home/michael/Downloads/open cv/OpenCV-2.1.0/include/opencv/cxmat.hpp: In member function ‘void cv::Mat::locateROI(cv::Size&, cv::Point&) const’:
/home/michael/Downloads/open cv/OpenCV-2.1.0/include/opencv/cxmat.hpp:387:5: error: ‘ptrdiff_t’ was not declared in this scope
/home/michael/Downloads/open cv/OpenCV-2.1.0/include/opencv/cxmat.hpp:387:5: note: suggested alternatives:
/usr/local/lib/gcc/i686-pc-linux-gnu/4.6.1/../../../../include/c++/4.6.1/i686-pc-linux-gnu/bits/c++config.h:156:28: note: ‘std::ptrdiff_t’
/usr/local/lib/gcc/i686-pc-linux-gnu/4.6.1/../../../../include/c++/4.6.1/i686-pc-linux-gnu/bits/c++config.h:156:28: note: ‘std::ptrdiff_t’
/home/michael/Downloads/open cv/OpenCV-2.1.0/include/opencv/cxmat.hpp:387:15: error: expected ‘;’ before ‘delta1’
/home/michael/Downloads/open cv/OpenCV-2.1.0/include/opencv/cxmat.hpp:389:9: error: ‘delta1’ was not declared in this scope
/home/michael/Downloads/open cv/OpenCV-2.1.0/include/opencv/cxmat.hpp:398:31: error: ‘delta2’ was not declared in this scope
/home/michael/Downloads/open cv/OpenCV-2.1.0/include/opencv/cxmat.hpp: In member function ‘cv::Point cv::MatConstIterator_::pos() const’:
/home/michael/Downloads/open cv/OpenCV-2.1.0/include/opencv/cxmat.hpp:3459:9: error: ‘ptrdiff_t’ was not declared in this scope
/home/michael/Downloads/open cv/OpenCV-2.1.0/include/opencv/cxmat.hpp:3459:9: note: suggested alternatives:
/usr/local/lib/gcc/i686-pc-linux-gnu/4.6.1/../../../../include/c++/4.6.1/i686-pc-linux-gnu/bits/c++config.h:156:28: note: ‘std::ptrdiff_t’
/usr/local/lib/gcc/i686-pc-linux-gnu/4.6.1/../../../../include/c++/4.6.1/i686-pc-linux-gnu/bits/c++config.h:156:28: note: ‘std::ptrdiff_t’
/home/michael/Downloads/open cv/OpenCV-2.1.0/include/opencv/cxmat.hpp:3459:19: error: expected ‘;’ before ‘ofs’
/home/michael/Downloads/open cv/OpenCV-2.1.0/include/opencv/cxmat.hpp:3460:23: error: ‘ofs’ was not declared in this scope
/home/michael/Downloads/open cv/OpenCV-2.1.0/include/opencv/cxmat.hpp:3460:66: error: expected ‘)’ before ‘y’
/home/michael/Downloads/open cv/OpenCV-2.1.0/include/opencv/cxmat.hpp:3465:9: error: ‘ptrdiff_t’ was not declared in this scope
/home/michael/Downloads/open cv/OpenCV-2.1.0/include/opencv/cxmat.hpp:3465:9: note: suggested alternatives:
/usr/local/lib/gcc/i686-pc-linux-gnu/4.6.1/../../../../include/c++/4.6.1/i686-pc-linux-gnu/bits/c++config.h:156:28: note: ‘std::ptrdiff_t’
/usr/local/lib/gcc/i686-pc-linux-gnu/4.6.1/../../../../include/c++/4.6.1/i686-pc-linux-gnu/bits/c++config.h:156:28: note: ‘std::ptrdiff_t’
/home/michael/Downloads/open cv/OpenCV-2.1.0/include/opencv/cxmat.hpp:3465:19: error: expected ‘;’ before ‘ofs’
/home/michael/Downloads/open cv/OpenCV-2.1.0/include/opencv/cxmat.hpp:3466:23: error: ‘ofs’ was not declared in this scope
make[2]: *** [src/cxcore/CMakeFiles/cxcore_pch_dephelp.dir/cxcore_pch_dephelp.o] Error 1
make[1]: *** [src/cxcore/CMakeFiles/cxcore_pch_dephelp.dir/all] Error 2
make: *** [all] Error 2
Hey
I am very new to openCV. I need to compile the library exclusively for face detection. Any idea as to how could that be done ?
Any help would be deeply appreciated.
Hello Subleen,
Just follow this tutorial, there is an included example for face detection.
Dear Sebastian
I am new in OpenCV ,I bought your course and I download opencv in windows ,and visual studio 2010, as you said ,but I had that error
Build: 101 succeeded, 1 failed, 0 up-to-date, 4 skipped
when I debug it in visual studio debug faild .
what is the wrong ,I follow your instructions exactly?
i continue and make debug for release and add the 2 path .
but in the video of c++ interface basics,I did not understand where I can write cmake and make .
when I use cmake GUI ,it give me error in cofiguration process,project file may be invalid.
when I use the command it give me ‘cmake’ is not recognized as an internal or external command,
until now I can not excute any program.
please help.
thank you in advance.
Hi alimmali,
It is hard to say without knowing what the error says.
Keep in mind also that OpenCV is modular, and you may still be able to use it if the error is in another part that you are not planning to use.
If you have errors in the configuration process, make sure that all the required libraries are correctly installed (like Qt or VTK for example), and their path is correctly set in cmake gui.
The error you are getting with cmake in the command line is because you don’t have added it to the system path. Just add the location of cmake.exe to the system path and you should be able to use in in the command line. But, it is the same as the cmake-gui in the end…
I hope it helps!