UPDATE: You can also install OpenCV 3.2.0 in Ubuntu 16.04LTS.
Many people have used my previous tutorial about installing OpenCV 2.1 in Ubuntu 9.10. In the comments of that post, I noticed great interest for using OpenCV with Python and the Intel Threading Building Blocks (TBB). Since new versions of OpenCV and Ubuntu are available, I decided to create a new post with detailed instructions for installing the latest version of OpenCV, 2.2, in the latest version of Ubuntu, 11.04, with Python and TBB support.
First, you need to install many dependencies, such as support for reading and writing image files, drawing on the screen, some needed tools, etc… This step is very easy, you only need to write the following command in the Terminal
sudo apt-get install build-essential libgtk2.0-dev libjpeg62-dev libtiff4-dev libjasper-dev libopenexr-dev cmake python-dev python-numpy libtbb-dev libeigen2-dev yasm libfaac-dev libopencore-amrnb-dev libopencore-amrwb-dev libtheora-dev libvorbis-dev libxvidcore-dev
Now we need to get and compile the ffmpeg source code so that video files work properly with OpenCV. This section is partially based on the method discussed here.
cd ~
wget https://ffmpeg.org/releases/ffmpeg-0.7-rc1.tar.gz
tar -xvzf ffmpeg-0.7-rc1.tar.gz
cd ffmpeg-0.7-rc1
./configure --enable-gpl --enable-version3 --enable-nonfree --enable-postproc --enable-libfaac --enable-libopencore-amrnb --enable-libopencore-amrwb --enable-libtheora --enable-libvorbis --enable-libxvid --enable-x11grab --enable-swscale --enable-shared
make
sudo make install
The next step is to get the OpenCV 2.2 code:
cd ~
wget https://downloads.sourceforge.net/project/opencvlibrary/opencv-unix/2.2/OpenCV-2.2.0.tar.bz2
tar -xvf OpenCV-2.2.0.tar.bz2
cd OpenCV-2.2.0/
Now we have to generate the Makefile by using cmake. In here we can define which parts of OpenCV we want to compile. Since we want to use Python and TBB with OpenCV, here is where we set that. Just execute the following line at the console to create the appropriate Makefile. Note that there is a dot at the end of the line, it is an argument for the cmake program and it means current directory.
cmake -D WITH_TBB=ON -D BUILD_NEW_PYTHON_SUPPORT=ON -D WITH_V4L=OFF -D INSTALL_C_EXAMPLES=ON -D INSTALL_PYTHON_EXAMPLES=ON -D BUILD_EXAMPLES=ON .
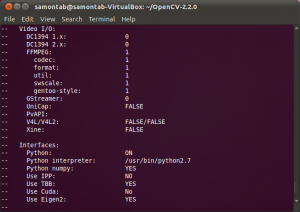
Check that the above command produces no error and that in particular it reports FFMPEG as 1. If this is not the case you will not be able to read or write videos. Also, check that Python reports ON and Python numpy reports YES. Also, check that under Use TBB it says YES. If anything is wrong, go back, correct the errors by maybe installing extra packages and then run cmake again. You should see something similar to this:
Now, you are ready to compile and install OpenCV 2.2:
make
sudo make install
Now you have to configure OpenCV. First, open the opencv.conf file with the following code:
sudo gedit /etc/ld.so.conf.d/opencv.conf
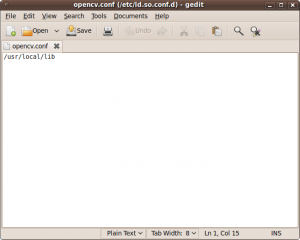
Add the following line at the end of the file(it may be an empty file, that is ok) and then save it:
/usr/local/lib
Run the following code to configure the library:
sudo ldconfig
Now you have to open another file:
sudo gedit /etc/bash.bashrc
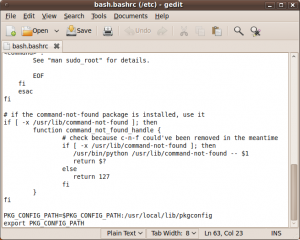
Add these two lines at the end of the file and save it:
PKG_CONFIG_PATH=$PKG_CONFIG_PATH:/usr/local/lib/pkgconfig
export PKG_CONFIG_PATH
Finally, close the console and open a new one, restart the computer or logout and then login again. OpenCV will not work correctly until you do this.
There is a final step to configure Python with OpenCV. You need to copy the file cv.so into the correct place. You can do that by just executing the following command:
sudo cp /usr/local/lib/python2.7/site-packages/cv.so /usr/local/lib/python2.7/dist-packages/cv.so
Now you have OpenCV 2.2 installed in your computer with Python and TBB support.
Let’s check some demos included in OpenCV.
First, let’s see some C demos:
cd ~/OpenCV-2.2.0/samples/c
chmod +x build_all.sh
./build_all.sh
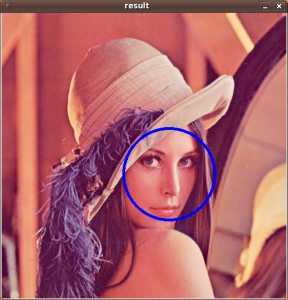
Some of the training data for object detection is stored in /usr/local/share/opencv/haarcascades. You need to tell OpenCV which training data to use. I will use one of the frontal face detectors available. Let’s find a face:
./facedetect --cascade="/usr/local/share/opencv/haarcascades/haarcascade_frontalface_alt.xml" --scale=1.5 lena.jpg
Note the scale parameter. It allows you to increase or decrease the size of the smallest object found in the image (faces in this case). Smaller numbers allows OpenCV to find smaller faces, which may lead to increasing the number of false detections. Also, the computation time needed gets larger when searching for smaller objects.
You can also detect smaller objects that are inside larger ones. For example you can search for eyes inside any detected face. You can do that with the nested-cascade parameter:
./facedetect --cascade="/usr/local/share/opencv/haarcascades/haarcascade_frontalface_alt.xml" --nested-cascade="/usr/local/share/opencv/haarcascades/haarcascade_eye.xml" --scale=1.5 lena.jpg

Feel free to experiment with other features like mouth or nose for example using the corresponding cascades provided in the haarcascades directory.
Now let’s check some C++ demos:
cd ~/OpenCV-2.2.0/samples/cpp
make
Now all the C++ demos are built in ~/OpenCV-2.2.0/bin. Let’s see a couple of them. For example, a simulated chessboard calibration:
~/OpenCV-2.2.0/bin/calibration_artificial
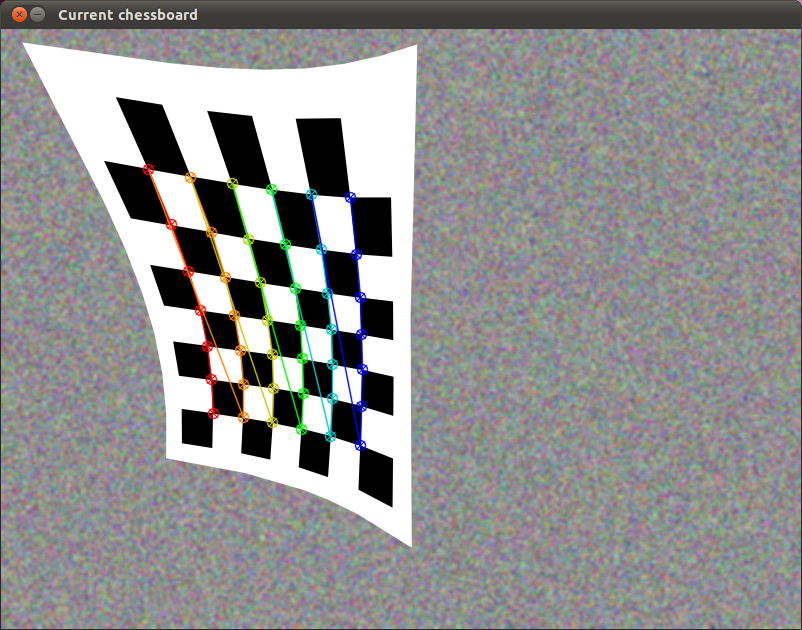
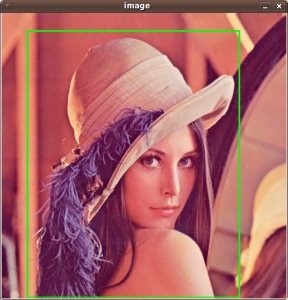
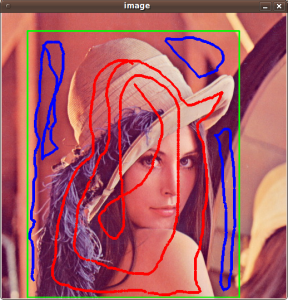
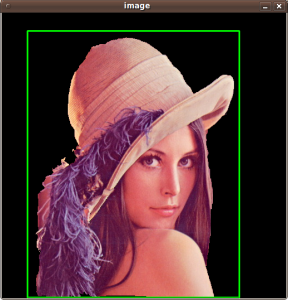
In OpenCV 2.2, the grabcut algorithm is provided as a C++ sample. This is a very nice segmentation algorithm that needs very little user input to segment the objects in the image. For using the demo, you need to select a rectangle of the area you want to segment. Then, hold the Control key and left click to select the background (in Blue). After that, hold the Shift key and left click to select the foreground (in Red). Then press the n key to generate the segmentation. You can press n again to continue to the next iteration of the algorithm.
~/OpenCV-2.2.0/bin/grabcut ~/OpenCV-2.2.0/samples/cpp/lena.jpg
This image shows the initial rectangle for defining the object that I want to segment.
Now I roughly set the foreground (red) and background (blue).
When you are ready, press the n key to run the grabcut algorithm. This image shows the result of the first iteration of the algorithm.
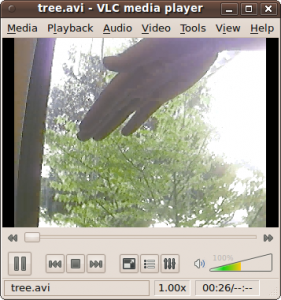
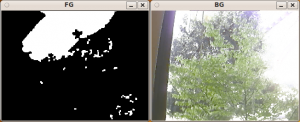
Now let’s see some background subtraction from a video. The original video shows a hand moving in front of some trees. OpenCV allows you to separate the foreground (hand) from the background (trees).
~/OpenCV-2.2.0/bin/bgfg_segm ~/OpenCV-2.2.0/samples/c/tree.avi
And finally, let’s see Python working with OpenCV:
cd ~/OpenCV-2.2.0/samples/python/
Let’s run the kmeans.py example. This script starts with randomly generated 2D points and then uses a clustering method called k-means. Each cluster is presented in a different color.
python kmeans.py
Now let’s see the convexhull.py demo. This algorithm basically calculates the smallest convex polygon that encompasses the data points.
python convexhull.py
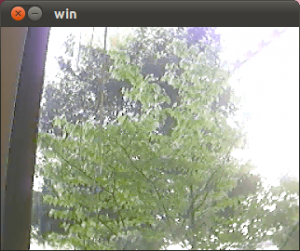
Python scripts can also be executed directly like the following example. This script reads a video file (../c/tree.avi) within pyhton and shows the first frame on screen:
./minidemo.py





Have you also installed and used …… HighGUI ?
thanks for all the support you have given OpenCV developers………
99guspuppet
Thanks… Well, HighGUI is the basic cross platform UI used in OpenCV, so yes.. I have used it… you can see it in the screenshots :)
THANK YOU!!! for this “how to” using Ubuntu 11.04 and OpenCV 2.2.
I followed your instructions and now have OpenCV 2.2 library available to Python.
I did notice I got an error with the facedetect example: “could not load cascade”
I did verify that the specified .xml file was indeed present in the specified location.
the other examples worked fine though.
woo hoo!
Perfect! It helped me alot! Thank you so much!
Thanks a lot, I’m develop my university project with Qt and OpenCV and you gave me the solution to compile the program succefully.
Thanks a lot, everything done!!! but I’m trying to run some samples in Ubuntu on Code Blocks and it tells me: error while loading shared libraries: cv.so : cannot open shared object file: No such file or directory
can anyone help, please????????!!!!!!!!
@iceman
It seems that you missed a couple of steps in the tutorial. Remember that you have to open a new console, or logout and login again to make it work.
If the problem persists, please re install OpenCV carefully following the tutorial step by step and it should work.
I just installed codeblocks to see if there is something wrong with it, but the samples worked perfectly… This means that you missed a couple of steps in the tutorial :)
@dexter
Great to hear that you got it working…
About the error in the example, double check that the parameter that you are giving to the sample is correct. The only problem I can think of is that maybe the quotes got changed when you copied the command… to make sure, manually type the quote symbol ( ” ) at the beginning and end of the path…
Thanks, this worked great on Xubuntu 11.04 with OpenCV 2.2.0.
I notice the cmake, make, and make install steps spew out miles and miles of information….is this captured in a log file somewhere?
I KNOW I saw lots of warnings and errors…but I can’t read that fast.
By default it is just written in the console. You could repeat the process and add the following to keep a file with that text:
make > makeLog.txt
That will write everything in the makeLog.txt file instead…. then you can read that file….
Although if it compiled, there were no errors, just warnings…
Thank you…It works for me after trying a lot of other procedure :)
But can you please help me how can I make it work in Urbi? I am trying with ‘loadModule’ but it is not helping and always says “file not found!”
I had been eagerly awaiting this post. All your tutorials to install OpenCV are of great help. Thank you Sir. :-)
Hi I am new to linux and openCV so please dont mind if the question is too trivial. I have installed openCV and tried the sample programs as you have mentioned and it is working fine. Now I have my own C++ program written using open CV. How do I compile it and get it running?
Let’s start from the beginning then. If your C++ code is in a source file called main.cpp, you normally would do something like this to compile it:
g++ -o myApp main.cppThis will produce the executable called myApp. You can then run it with this command:
./myAppTo compile with the OpenCV libraries, you can do something like this:
g++ -o myApp main.cpp `pkg-config --libs --cflags opencv`For larger projects or convenience, you may consider using a Makefile. After you create that file you can build your project by just typing make.
Thank you so much that helped!!!!
One last question. I am using a program that calling another. so is there any way I can put all these programs in one folder and and get a single excecutable file. I dont know how ta create a makefile!
You would need the source code of the other program in order to merge both of them into a single executable.
If you don’t have the source code, you can always call the external executable from your code using the system function. Something like this:
 #include "cstdlib"
 int main()
 {
 system("ls");
 return 0;
 }
In the previous example, I am executing the ls program inside my program. The ls program lists the files in the current directory. So when you compile and execute that code, you will get the same result as calling ls directly. You just need to change ls with the path to your executable.
Thank you!!
I also have another issue. When I try to run the camshift demo code, there is an error that says,
could not initialize capturing…
I have a dell studio15 with a built in cam and it is working fine with skype onlinux
That’s too specific, and I don’t have that hardware, but I’m guessing that you may need to install different drivers or libraries like video for linux (v4l2)… I can’t help you more than that though…
Hi,
very nice howto. Did you try to install opencv2.3? What changes should be considered to get opencv2.3 running? I tried it and it endet up with an error during the “make”-step.
A couple of days after I posted this tutorial they released the new version…
I installed 2.3 without any problems though… maybe in the future I will update this guide to it…. before 2.4 comes out hopefully :)
I installed OpenCV 2.2 on my xubuntu 10.04 laptop, and THIS time all your examples work. Thee facedetect example was notable in NOT working on my Ubuntu 11.04 Desktop PC. I’ve yet to copy and try the python examples I’ve collected.
Maybe it’s just increased awareness of what’s happening during the installation process.
I did notice that gstreamer is required, and it seems to work better installing that with the Synaptic Package Manager. (it was already installed, but i added the -dev and -dgb packages as well this time)
Also the config/make/install process for ffmpeg-0.7-rc1 warns me that certain things are missing. libusb0.1, libdc1394, libraw1394 and libraw1394-2
Some of these I was able to find on the internet and install, some not.
I’m going back to my Ubuntu 11.04 desktop PC, retracing the steps of config/make/install
for ffmpeg and OpenCV 2.2.
I saved the output of the config for ffmpeg-0.7-rc1 to a text file, and
buried in all that information I see:
libdc1394 support no
libopencv support no
is this something I need to fix?
One other question…your instructions for OpenCV 2.2 say (among other options)
cmake -D WITH_V4L=OFF
Why is that? My webcam is UVC, don’t I need V4L support? Or something like that?
I gather there is something newer called V4L2. Can I use that instead/also?
Thank you for your guide sebastian.
Do the examples below use TBB automatically ?
Or are there any special examples which make use of TBB ?
You are very welcome.
TBB functionality is embedded in some of the functions of the library. By just using these functions, you will be automatically using TBB. There is no need to change your code.
If you need to know exactly which functions implement TBB, you can take a look at the source code of OpenCV and search for TBB usage.
Thank you. It’s work.
Thanks a lot !! I spent a whole week trying to install OpenCv correctly until i found this guide, really great job! thanks!
Hello! Thank you for instruction. I have successfully installed OpenCV 2.3 on Kubuntu 11.04.
But I have one problem. Webcam isn’t recognized in any openCV samples.
In Skype, Cheese and other applications it works.
I solved my problem reinstalling OpenCV by official instruction:
http://opencv.willowgarage.com/wiki/InstallGuide%20%3A%20Debian
Thanks for the post..I have installed opencv 2.2 in ubuntu11.04 and all the above examples work fine. But its not detecting my webcam. I am unable to use camera capture. With opencv 2.0 in ubuntu 10.10, it was working properly. Can you suggest any solution?.. and one more thing, is there any good tutorial for opencv-python?
Thank you Viktor.Just now I saw your comment, and installed opencv2.3 with the help of the link you provided. Its working with my webcam. And again, can anyone suggest some tutorial for opencv-python interface other than its documentation?
Great post, Thanks a ton for your help and support regarding this.
Regards,
Hrushikesh
can i use the same steps for installing opencv2.3 ? if not is there any good reference for installing opencv2.3 on linux?
You should be able to install it using the same method.
Thank suji and Viktor, I finally could use my webcam. I also thank samontab, this tutorial is perfect. But I think V4L should be on, or I cannot use my webcam.(Maybe this is my case) In the end, I’m very grateful for all your help.
I would like to link static libraries when compiling my OpenCV projects. What would I have to do to accomplish this?
Thanks for the great tutorial so far
thanks for sharing..i have suceessfully installed Open CV 2.3.0 with the help of this tutorial ..soon will be working on it..
I have a problem when y try to run the kmeans.py example. This is the message:
Traceback (most recent call last):
File “kmeans.py”, line 3, in
import cv
ImportError: No module named cv
Could someone please help me?
You missed at least one step. Try following the tutorial again step by step. I guess you missed this part:
sudo cp /usr/local/lib/python2.7/site-packages/cv.so /usr/local/lib/python2.7/dist-packages/cv.so
Thanks for your tutorial, very useful. I have successfully installed OpenCV, Thank you dude, Keep in touch, seeya…
thanks. It’s work. OpenCV 2.3 with Ubuntu 11.04
Thanks buddy :), it’s working fine :)
Thanks! This works in general, but for some reason, certain methods do not work:
>>>import cv
>>> cv.cvCreateImage
Traceback (most recent call last):
File “”, line 1, in
AttributeError: ‘module’ object has no attribute ‘cvCreateImage’
Whereas:
>>> cv.Canny
Why do only some functions work??
tylerthemiler
mmm… I have read that the Python interface may be not complete yet… other than that, I do not really know…
Great explanation. Worked fine for me.
thanks man……great work
Hi,
Your post is very useful thanks.
I’m asking one question, have you ever try to use OpenCV on an embedded platform? And if it the case wich one?
I’m trying to do it on an PandaBoard and an IrisBoard but I have problems with the vidéos. When I try programs using pictures OpenCV works, but when i use vidéos, I have this warning: no accelerated colors space found for yuv to rgb.
Do you know what dose it mean?
I have try to use others video format, but I have the same warning.
I got the response to
cmake -D WITH_TBB=ON -D BUILD_NEW_PYTHON_SUPPORT=ON -D WITH_V4L=OFF -D INSTALL_C_EXAMPLES=ON -D INSTALL_PYTHON_EXAMPLES=ON -D BUILD_EXAMPLES=ON .
as
– Built as dynamic libs?: YES
— Compiler: /usr/bin/c++
— C++ flags (Release): -Wall -pthread -march=i686 -ffunction-sections -O3 -DNDEBUG -fomit-frame-pointer -ffast-math -msse -msse2 -mfpmath=387 -DNDEBUG
— C++ flags (Debug): -Wall -pthread -march=i686 -ffunction-sections -g -O0 -DDEBUG -D_DEBUG -ggdb3
— Linker flags (Release):
— Linker flags (Debug):
—
— GUI:
— GTK+ 2.x: YES
— GThread: YES
—
— Media I/O:
— ZLib: YES
— JPEG: TRUE
— PNG: TRUE
— TIFF: TRUE
— JPEG 2000: TRUE
— OpenEXR: YES
— OpenNI: NO
— OpenNI PrimeSensor Modules: NO
— XIMEA: NO
—
— Video I/O:
— DC1394 1.x: NO
— DC1394 2.x: YES
— FFMPEG: YES
— codec: YES
— format: YES
— util: YES
— swscale: YES
— gentoo-style: YES
— GStreamer: NO
— UniCap: NO
— PvAPI: NO
— V4L/V4L2: FALSE/FALSE
— Xine: NO
—
— Other third-party libraries:
— Use IPP: NO
— Use TBB: YES
— Use ThreadingFramework: NO
— Use Cuda: NO
— Use Eigen: YES
—
— Interfaces:
— Python: YES
— Python interpreter: /usr/bin/python2.7 -B (ver 2.7)
— Python numpy: YES
— Java: NO
—
— Documentation:
— Sphinx: NO
— PdfLaTeX compiler: NO
— Build Documentation: NO
—
— Tests and samples:
— Tests: YES
— Performance tests: YES
— Examples: YES
—
— Install path: /usr/local
—
— cvconfig.h is in: /home/vinod/Programs/OpenCV23/OpenCVSVN/opencv
— —————————————————————–
—
CMake Warning at CMakeLists.txt:1802 (message):
The source directory is the same as binary directory. “make clean” may
damage the source tree
— Configuring done
— Generating done
— Build files have been written to: /home/vinod/Programs/OpenCV23/OpenCVSVN/opencv
FFMPG = YES instead of 1.
How can I correct this.
It should work as well.
Ran the camshiftdemo in the bin folder.
The following message came:
———————-
This is a demo that shows mean-shift based tracking
You select a color objects such as your face and it tracks it.
This reads from video camera (0 by default, or the camera number the user enters
Usage:
./camshiftdemo [camera number]
Hot keys:
ESC – quit the program
c – stop the tracking
b – switch to/from backprojection view
h – show/hide object histogram
p – pause video
To initialize tracking, select the object with mouse
***Could not initialize capturing…***
Current parameter’s value:
1 [ ] ( -1 – by default) – camera number
————————-
Are you able to capture video from webcam.
To enable video capture instead of WITH_V4L=OFF , WITH_V4L=ON must be there in the cmake variable list.
This is the best tutorial I have found to build OpenCV on Linux.
The latest two versions of opencv and ffmpeg prove to work for me.
On an Intel dual core 2.8 with no Nvidia (on board graphics) I have found the wrong combination of ffmpeg and OpenCV results in errors on make here
[ 15%] Building CXX object modules/highgui/CMakeFiles/opencv_highgui.dir/src/cap_ffmpeg.o
with output like this
make[2]: *** [modules/highgui/CMakeFiles/opencv_highgui.dir/src/cap_ffmpeg.o] Error 1
make[1]: *** [modules/highgui/CMakeFiles/opencv_highgui.dir/all] Error 2
make: *** [all] Error 2
The following works:-
I have used
ffmpeg-0.8.5 –
wget http://ffmpeg.org/releases/ffmpeg-0.8.5.tar.gz
tar -xvzf ffmpeg-0.8.5.tar.gz
cd ffmpeg-0.8.5
./configure –enable-gpl –enable-version3 –enable-nonfree –enable-postproc –enable-libfaac –enable-libopencore-amrnb –enable-libopencore-amrwb –enable-libtheora –enable-libvorbis –enable-libxvid –enable-x11grab –enable-swscale –enable-shared
and OpenCV-2.3.1a –
wget http://downloads.sourceforge.net/project/opencvlibrary/opencv-unix/2.3.1/OpenCV-2.3.1a.tar.bz2
To test some paths have to be adjusted, of course.
e.g. in the following commands, obviously –
cd ~/OpenCV-2.2.0/samples/c
chmod +x build_all.sh
./build_all.sh
I have also not been able to locate cv.so yet (I have cv2.so) but have not test python yet, so maybe OK without following command?
sudo cp /usr/local/lib/python2.7/site-packages/cv.so /usr/local/lib/python2.7/dist-packages/cv.so
I have the following two directories –
/usr/local/share/opencv/samples/c
/usr/local/share/OpenCV/haarcascades
So the path in the test below has been altered, again obviously.
/opencv-magic/OpenCV-2.3.1/samples/c$ ./facedetect –cascade=”/usr/local/share/OpenCV/haarcascades/haarcascade_frontalface_alt.xml” –scale=1.5 lena.jpg
Should say, this is a fresh install of Ubuntu 11.10 alpha
I will come back after further tests.
I have run through all the python tests and all OK. Seems that the line
sudo cp /usr/local/lib/python2.7/site-packages/cv.so /usr/local/lib/python2.7/dist-packages/cv.so
is not necessary with these latest builds.
hi i m maheshmhegade@gmail.com .
i m new to opencv i want to read a perticular frame from a given .avi video (say i want to read a 210th frame of “fun.avi” file) how can i read and retrive frame using cvquery function.or using if any fuction
thank you
There are some functions in highgui to deal with that but they don’t work for me at least…
The easiest workaround that I have found to solve your problem is to query a frame 210 times, and return that image.
If that is too slow for you, you can also save the individual frames as images, for example video001_frame00001.jpg, video001_frame00002.jpg, etc. That way, you can access any frame at any moment.
highgui is only for simple video usage (mainly for playing and recording videos), if you want to do more advanced video editing, you could use ffmpeg, mencoder, mplayer, etc. Or even post processing a video with avidemux for example…
Thank you so much!
Very useful tutorial.
Thanks for the great tutorial. It worked well. I’ve recently reinstalled the Ubuntu and went with the newest version (11.10). While trying to build OpenCV 2.3.1, I get the message during linking:
Linking CXX shared library ../../lib/libopencv_highgui.so
/usr/bin/ld: /usr/local/lib/libavcodec.a(avpacket.o): relocation R_X86_64_32S against `av_destruct_packet’ can not be used when making a shared object; recompile with -fPIC
/usr/local/lib/libavcodec.a: could not read symbols: Bad value
collect2: ld returned 1 exit status
make[2]: *** [lib/libopencv_highgui.so.2.3.1] Error 1
make[1]: *** [modules/highgui/CMakeFiles/opencv_highgui.dir/all] Error 2
make: *** [all] Error 2
Do you have any tips to resolve it? I’m on x64 Intel and x64 Ubuntu, if that makes a difference.
Thank you so much! I went through so much pain and anguish trying to get openCV on my machine. This tutorial helped a bunch!
HELP.!
I got error for proceed until the step
“Now, you are ready to compile and install OpenCV 2.2:
make
sudo make install
”
I follow all the step above and works very well. But there are error after i type “make”.
/usr/include/c++/4.6/typeinfo:42:37: error: expected ‘}’ before end of line
/usr/include/c++/4.6/typeinfo:42:37: error: expected declaration before end of line
make[2]: *** [modules/core/CMakeFiles/opencv_core_pch_dephelp.dir/opencv_core_pch_dephelp.o] Error 1
make[1]: *** [modules/core/CMakeFiles/opencv_core_pch_dephelp.dir/all] Error 2
make: *** [all] Error 2
How can i fix it? Thanks!
Hard to tell… it could be many things…
I recommend you to re install the OS and start from scratch following every line of the tutorial. It is the easiest way to make it work without a problem.
I tried several times…
I’m using ubuntu 11.10. It is cause the problem?
After i type make the output is
[ 2%] Building CXX object modules/core/CMakeFiles/opencv_core_pch_dephelp.dir/opencv_core_pch_dephelp.o
In file included from /home/gp2/OpenCV-2.2.0/modules/core/src/precomp.hpp:55:0,
from /home/gp2/OpenCV-2.2.0/modules/core/opencv_core_pch_dephelp.cxx:1:
/home/gp2/OpenCV-2.2.0/modules/core/include/opencv2/core/core.hpp:354:13: error: ‘ptrdiff_t’ does not name a type
Thanks for help again!
It may be the problem.
If you use another OS, the libraries and programs that are installed may be different. They may have different dependencies, or even work differently.
In general, if you use an OS with small differences, like 11.04 and 11.10, it should be OK to follow the same tutorial but with small changes. The problem in that scenario is that you need to know what you are doing, and not follow the steps blindly.
If you just need to get it working ASAP, install 11.04 from scratch and follow this tutorial.
Hi to all.
@NewtoOpencv
please let yourself visit this link:
https://bugs.launchpad.net/ubuntu/+source/opencv/+bug/791527
if I’d understood, we discuss about problems with newer g++ version?
this is a great tutorial … and very much thankfull for your knowledge sharing .. keep it up buddy.
i compiled the opencv using this tutorial, very useful
but is there any update for newer versions of opencv?
You may need to change some bits here and there, but if you know what you are doing, you should be able to install any newer openCV version based on this tutorial.
hi,
great blog! I read in the ‘about’ section that you also work on IP cameras. Could you guide me how to capture a MJPEG stream from an IP camera to OpenCV?
Thanks!
Hello,
I usually create a function, like getFrame(), that returns an OpenCV image and deals with everything I need to do to get an image from the connected camera. This can be just OpenCV highgui functions for webcams or more specific code for IP cameras. Then, I just use that function on the main loop of the program.
That way, I can easily change the camera to another one and the program still works the same.
Hey thank you for your great help regarding installation of OpenCv 2.2 on ubuntu 11.04
how to install and make it working for c and c++ not for python….
The post explains how to install the library for those three languages. Once you install it you can use it with C, C++ and Python.
Hi, this is a extremely prefect tutorial I never saw before.But I have a small problem with the “TBB”. I use the function “cmake -D WITH_TBB=ON .”, but the TBB still with ‘no’ state. Is that my 11.04 ubuntu caused by this?.
Make sure that you have correctly installed the TBB development library before you compile opencv
For those having problems following this on Ubuntu 11.10:
If you are getting errors on making OpenCV then I believe the fix is to make a small modification to the includes for cxcore.hpp however I think the easier solution is to install OpenCV-2.3.0 rather than OpenCV-2.2.0.
I followed this guide exactly except replacing 2.2.0 with 2.3.0 and everything seems fine.
I wanted to have OpenCV 2.2 or later in Linuxmint. This post helped me to compile ffmpeg-0.8.5 and OpenCV-2.3.1a under Linuxmint 11, although I could not make it work for Linuxmint 12. Thanks to both Sebastian Montabone and Adam Saltiel.
@samontab
Dude.. You saved my day. Thank u very much.. :)
Glad I could help :)
hai i tried installing opencv and got some errore can u please help
[ 49%] Built target opencv_lapack
[ 49%] Building CXX object src/cxcore/CMakeFiles/cxcore_pch_dephelp.dir/cxcore_pch_dephelp.o
In file included from /home/vivek/OpenCV-2.0.0/include/opencv/cxcore.h:2123:0,
from /home/vivek/OpenCV-2.0.0/src/cxcore/_cxcore.h:60,
from /home/vivek/OpenCV-2.0.0/release/src/cxcore/cxcore_pch_dephelp.cxx:1:
/home/vivek/OpenCV-2.0.0/include/opencv/cxcore.hpp:169:13: error: ‘ptrdiff_t’ does not name a type
In file included from /home/vivek/OpenCV-2.0.0/include/opencv/cxcore.hpp:2243:0,
from /home/vivek/OpenCV-2.0.0/include/opencv/cxcore.h:2123,
from /home/vivek/OpenCV-2.0.0/src/cxcore/_cxcore.h:60,
from /home/vivek/OpenCV-2.0.0/release/src/cxcore/cxcore_pch_dephelp.cxx:1:
/home/vivek/OpenCV-2.0.0/include/opencv/cxoperations.hpp:1916:15: error: ‘ptrdiff_t’ does not name a type
/home/vivek/OpenCV-2.0.0/include/opencv/cxoperations.hpp:2465:31: error: ‘ptrdiff_t’ does not name a type
In file included from /home/vivek/OpenCV-2.0.0/include/opencv/cxcore.hpp:2244:0,
from /home/vivek/OpenCV-2.0.0/include/opencv/cxcore.h:2123,
from /home/vivek/OpenCV-2.0.0/src/cxcore/_cxcore.h:60,
from /home/vivek/OpenCV-2.0.0/release/src/cxcore/cxcore_pch_dephelp.cxx:1:
/home/vivek/OpenCV-2.0.0/include/opencv/cxmat.hpp: In member function ‘void cv::Mat::locateROI(cv::Size&, cv::Point&) const’:
/home/vivek/OpenCV-2.0.0/include/opencv/cxmat.hpp:356:5: error: ‘ptrdiff_t’ was not declared in this scope
/home/vivek/OpenCV-2.0.0/include/opencv/cxmat.hpp:356:5: note: suggested alternatives:
/usr/include/c++/4.6/x86_64-linux-gnu/./bits/c++config.h:156:28: note: ‘std::ptrdiff_t’
/usr/include/c++/4.6/x86_64-linux-gnu/./bits/c++config.h:156:28: note: ‘std::ptrdiff_t’
/home/vivek/OpenCV-2.0.0/include/opencv/cxmat.hpp:356:15: error: expected ‘;’ before ‘delta1’
/home/vivek/OpenCV-2.0.0/include/opencv/cxmat.hpp:358:9: error: ‘delta1’ was not declared in this scope
/home/vivek/OpenCV-2.0.0/include/opencv/cxmat.hpp:367:31: error: ‘delta2’ was not declared in this scope
make[2]: *** [src/cxcore/CMakeFiles/cxcore_pch_dephelp.dir/cxcore_pch_dephelp.o] Error 1
make[1]: *** [src/cxcore/CMakeFiles/cxcore_pch_dephelp.dir/all] Error 2
make: *** [all] Error 2
it seems that you are installing a different version, 2.0. Try again following the steps carefully and it should work.
ne idea how to get opencv n python installed in fedora11???
hi, thank you for the tutorial, i want to ask you please, how to build gpu projects (samples hog for example)? i use ubuntu 11.10 and Opencv 2.3.1.
thank you
I got the following error message as I tried to install OpenCV 2.3.1 on Ubuntu 12.04 :
The following packages have unmet dependencies:
libjpeg-turbo8-dev : Conflicts: libjpeg62-dev but 6b1-2ubuntu1 is to be installed
E: Error, pkgProblemResolver::Resolve generated breaks, this may be caused by held packages.
This was after typing in the first sudo pat-get install build-essential ….
I got this while making opencv2.2
Linking CXX executable ../../bin/opencv_createsamples
../../lib/libopencv_highgui.so.2.2.0: undefined reference to `cvCreateCameraCapture_V4L(int)’
collect2: ld returned 1 exit status
make[2]: *** [bin/opencv_createsamples] Error 1
make[1]: *** [modules/haartraining/CMakeFiles/opencv_createsamples.dir/all] Error 2
make: *** [all] Error 2
plz help me
Linking CXX executable ../../bin/opencv_createsamples
../../lib/libopencv_highgui.so.2.2.0: undefined reference to `cvCreateCameraCapture_V4L(int)’
collect2: ld returned 1 exit status
make[2]: *** [bin/opencv_createsamples] Error 1
make[1]: *** [modules/haartraining/CMakeFiles/opencv_createsamples.dir/all] Error 2
make: *** [all] Error 2
root@pavan:/home/pavan/OpenCV-2.2.0/samples/c# ./facedetect –cascade=”/usr/local/share/opencv/haarcascades/haarcascade_frontalface_alt.xml” –nested-cascade=”/usr/local/share/opencv/haarcascades/haarcascade_eye.xml”
This program demonstrates the haar cascade recognizer
this classifier can recognize many ~rigid objects, it’s most known use is for faces.
Usage:
./facedetect [–cascade= this is the primary trained classifier such as frontal face]
[–nested-cascade[=nested_cascade_path this an optional secondary classifier such as eyes]]
[–scale=
[filename|camera_index]
see facedetect.cmd for one call:
./facedetect –cascade=”../../data/haarcascades/haarcascade_frontalface_alt.xml” –nested-cascade=”../../data/haarcascades/haarcascade_eye.xml” –scale=1.3
Hit any key to quit.
Using OpenCV version %s
2.2.0
Processing 1 –cascade=/usr/local/share/opencv/haarcascades/haarcascade_frontalface_alt.xml
from which we have cascadeName= /usr/local/share/opencv/haarcascades/haarcascade_frontalface_alt.xml
Processing 2 –nested-cascade=/usr/local/share/opencv/haarcascades/haarcascade_eye.xml
Capture from CAM 0 didn’t work
In image read
help me…!
Hello has anyone ever successfully compiled opencv2.3.1 library on linux with cuda enabled? i downloaded the cuda toolkit 4.1and the nvidia driver as well, however compilation fails at 87% . I dont really know how to proceed at this point. I would highly appreciate any advice. thak you.
below is the error message :
[ 87%] Building CXX object modules/gpu/CMakeFiles/opencv_gpu.dir/src/element_operations.o
/home/sayid/OpenCV-2.3.1/modules/gpu/src/element_operations.cpp: In function ‘void cv::gpu::absdiff(const cv::gpu::GpuMat&, const cv::gpu::GpuMat&, cv::gpu::GpuMat&, cv::gpu::Stream&)’:
/home/sayid/OpenCV-2.3.1/modules/gpu/src/element_operations.cpp:298: error: ‘nppiAbsDiff_8u_C4R’ was not declared in this scope
/home/sayid/OpenCV-2.3.1/modules/gpu/src/element_operations.cpp:302: error: ‘nppiAbsDiff_32s_C1R’ was not declared in this scope
make[2]: *** [modules/gpu/CMakeFiles/opencv_gpu.dir/src/element_operations.o] Error 1
make[1]: *** [modules/gpu/CMakeFiles/opencv_gpu.dir/all] Error 2
make: *** [all] Error 2
HI
I’ve installed opencv, When I use “pkg-config –libs opencv” in terminal I get
“/usr/local/lib/libopencv_calib3d.so /usr/local/lib/libopencv_contrib.so /usr/local/lib/libopencv_core.so /usr/local/lib/libopencv_features2d.so /usr/local/lib/libopencv_flann.so /usr/local/lib/libopencv_gpu.so /usr/local/lib/libopencv_highgui.so /usr/local/lib/libopencv_imgproc.so /usr/local/lib/libopencv_legacy.so /usr/local/lib/libopencv_ml.so /usr/local/lib/libopencv_nonfree.so /usr/local/lib/libopencv_objdetect.so /usr/local/lib/libopencv_photo.so /usr/local/lib/libopencv_stitching.so /usr/local/lib/libopencv_ts.so /usr/local/lib/libopencv_video.so /usr/local/lib/libopencv_videostab.so ”
rather than ”
-L/usr/local/lib -lopencv_core -lopencv_imgproc -lopencv_highgui -lopencv_ml –
lopencv_video -lopencv_features2d -lopencv_calib3d -lopencv_objdetect -lopencv_contrib
-lopencv_legacy -lopencv_flann
”
Do you know whats the problem?
Hellow, thank’s for the tutorial, but I have a little problem with the library. When I try to capture images from my webcam, I just can’t do it. I’m using the cvCaptureFromCAM function and cvCreateCameraCapture, but the device doesn’t work. I think that the problem is from the instalation, any idea?
Thank you again…
You can try with -D WITH_V4L=ON on the make procedure.
(V4L stands for Video for Linux)
Quite nice! This instruction solved mi problem, besides this package apt-get install libv4l-0 libv4l-dev. Thank you once again…
I can only agree with the many people above:
Thank you!
I’m glad that I can help :)
Thank for the information in this blog. I’m a student trying to install OpenCV on Ubunto 11.04
But I’m stuck because make process in OpenCV build isn’t working.
Error comment is like this.
Linking C static library ../lib/libzlib.a
[ 3%] Building CXX…. blarblar..
/root/OpenCV-2.2.0/modules/core/include/opencv2/core/core.hpp::354:13:error:’ptrdiff_t” does not name a type…..
Please reply ã… _ã…
Oh.. I miss somthing..
I mistook that I erased the directory ‘ root/ffmpeg’
Is this the reason OpenCV build isn’t working??
It is hard to say, but given the output you are showing me, I can tell that you are not following the instructions exactly as they are because I never used a root directory.
Try following more carefully the instructions and it should work.
Hello, your tutorial helped a lot. But i am not able to understand how to link two opencv files as i have to create a big project. The makefile also produces error
Hi,
You should make libraries instead of executables on each project and then link them together to get your final executable, using both projects.
You can do that manually or editing the cmake files.
Excellent Tutorial….!!!
I am very thankful to Mr.Sebastian, I am taking Embedded Systems Educational Trainings,I am encouraging our students to go with open source.
This tutorial is really helpful.. I am thinking to switch from Matlab to OpenCV
Just I want to know , can i build same process on Raspberry-pi module having ( debian6) / ArcLinuxArm ?
Since Ubuntu is based on debian it should be a similar process, but not exactly the same. You may need to install additional libraries or maybe some libraries are not available in your specific distribution.
You can try installing the same libraries and see if it works. If not, it should ask you for the required libs.
Nice work, Thank you very much.
hello
thanks for the help
i was trying to install on ubuntu 10.10 running on live usb
on first step i got the following error –
ubuntu@ubuntu:~$ sudo apt-get install build-essential libgtk2.0-dev libjpeg62-dev libtiff4-dev libjasper-dev libopenexr-dev cmake python-dev python-numpy libtbb-dev libeigen2-dev yasm libfaac-dev libopencore-amrnb-dev libopencore-amrwb-dev libtheora-dev libvorbis-dev libxvidcore-dev
Reading package lists… Done
Building dependency tree
Reading state information… Done
E: Unable to locate package libtbb-dev
E: Unable to locate package libfaac-dev
E: Unable to locate package libopencore-amrnb-dev
E: Unable to locate package libopencore-amrwb-dev
E: Unable to locate package libxvidcore-dev
i keep trying further and then i got this error –
ubuntu@ubuntu:~$ cd ffmpeg-0.7-rc1
ubuntu@ubuntu:~/ffmpeg-0.7-rc1$ ./configure –enable-gpl –enable-version3 –enable-nonfree –enable-postproc –enable-libfaac –enable-libopencore-amrnb –enable-libopencore-amrwb –enable-libtheora –enable-libvorbis –enable-libxvid –enable-x11grab –enable-swscale –enable-shared
yasm not found, use –disable-yasm for a crippled build
If you think configure made a mistake, make sure you are using the latest
version from Git. If the latest version fails, report the problem to the
ffmpeg-user@ffmpeg.org mailing list or IRC #ffmpeg on irc.freenode.net.
Include the log file “config.log” produced by configure as this will help
solving the problem.
please help me i am in a real need of this
Those errors appear because you are using a different version of Ubuntu.
Use Ubuntu 11.04 and follow the tutorial step by step and you will have everything working.
If you need to use Ubuntu 10.10, you will need to change the steps in order to install the correct libraries.
I recommend you to just install Ubuntu 11.04 since it will be easier for you.
I’ve installed opencv, When I use “pkg-config –libs opencv†in terminal I get
“/usr/local/lib/libopencv_calib3d.so /usr/local/lib/libopencv_contrib.so /usr/local/lib/libopencv_core.so /usr/local/lib/libopencv_features2d.so /usr/local/lib/libopencv_flann.so /usr/local/lib/libopencv_gpu.so /usr/local/lib/libopencv_highgui.so /usr/local/lib/libopencv_imgproc.so /usr/local/lib/libopencv_legacy.so /usr/local/lib/libopencv_ml.so /usr/local/lib/libopencv_nonfree.so /usr/local/lib/libopencv_objdetect.so /usr/local/lib/libopencv_photo.so /usr/local/lib/libopencv_stitching.so /usr/local/lib/libopencv_ts.so /usr/local/lib/libopencv_video.so /usr/local/lib/libopencv_videostab.so â€
rather than â€
-L/usr/local/lib -lopencv_core -lopencv_imgproc -lopencv_highgui -lopencv_ml –
lopencv_video -lopencv_features2d -lopencv_calib3d -lopencv_objdetect -lopencv_contrib
-lopencv_legacy -lopencv_flann
Do you know what is the problem?
There isn’t any problem.
That’s the whole point of using pkg-config, you just ask to include opencv libs, independent of the version.
If OpenCV changes its libraries structure, pkg-config will still work, but if you hard code the libraries in the build process, it will fail.
So, there isn’t any problem.
Thanks for this article
Regards from Turkey
Hi, Thank you for this tutorial… I have a problem when I try to install the libtbb-dev library. This is the message:
libtbb-dev has no candidate.
Do you know the way of installing this library?
Thank you again.
It depends on your version.
Run this:
apt-cache search tbbYou should get a list of the libraries related to tbb that are available for your system.
If you see a good candidate, install that library.
If you don’t see a good candidate, probably your version of Ubuntu does not have the tbb library in the repositories, so you may install it from the source code.
Very good tutorial :) Very helpful and educating .
why I am getting problem with Debian 6.0.6 lenny with same way.
Because this guide is for Ubuntu.
Ubuntu is based on Debian, but there are some differences. You can still use this guide as a base, but you should compare which libraries are available in Debian, and maybe some other details.
Can anyone can help me to solve the issues listed in following.
http://stackoverflow.com/questions/11822759/issues-while-installing-opencv-library-for-php
Hi,
I already installed opencv 2.4.2 on my Ubuntu 12.04 lts system. But i would like to install opencv2.2.0 too. I think I should install this in any other directory. Is it posiible?
Reason: I had opencv 2.2 on my system Ubuntu10.04 lts,and I could take images & video with econ ECAM_32 usb webcam. Now sytem had upgraded to Ubuntu 12.04lts. I couldn’t install opencv 2.2 but could installed opencv 2.4.2. But now I can’t take images with econ ECAM -32 usb webcam. Some other camera like logitech hd720p is working.
I would like to keep opencv 2.4.2 in my sytem but I need opencv 2.2 too.
Could you help me?
Note however that maybe the camera does not work because of the change of OS from 10.04 to 12.04, not only the change in OpenCV version.
Hi, Thank you. I am also thinking like that. However I could install OpenCV 2.3 in home folder,but failed to take good images with that webcam.I still have doubt why this cam not working with my raspberry pi with opencv 2.4.2. So I would like to try one more time with opencv 2.2. I tried to install opencv 2.2 on ubuntu 12.04,but can not ‘make’ it succesful.Sometimes the ‘make’ run about 39%,sometimes it returned with 41% sometimes 44%. Could you tell me how I can install opencv 2.2 on UBuntu 12.04?
What do you mean with that?, the ‘make’ just stops?, what message does it give you?. Maybe there are some conflicting libraries installed?, it is hard to tell without any more information.
If you have Ubuntu 12.04 Desktop edition installed on a PC, you should not have any trouble installing OpenCV 2.2 on it. These guides were meant to be used on a regular Desktop PC or laptop. If you are running customized editions, or embedded hardware (like the Raspberry Pi) you may, or maybe not, have problems to install it. Those problems will be dependent of the customized edition or the embedded hardware that you are trying to use. That means that since I do not have access to any of those, I cannot be of much help.
Greetings everyone,
I’m kind of a unix noob yet and I was not able to install it. I’m stuck in the part: “. If anything is wrong, go back, correct the errors by maybe installing extra packages and then run cmake again”
I got several missing libries and packages. I looked for thoese packages on “ubunto sofware center” and found out that many of them I already have installed and for the rest of them there is no reference.
So, what do I do whit the already installed but not recognized by the instalation ones and the not referenced ones?
By the way, why is it so hard to install anything on linux? Everytime I try I fail over and over.
Hello Juarez,
I guess you are referring to GNU/Linux, or just Linux, instead of Unix. In fact, GNU stands for “GNU is Not Unix!”, so by definition Linux is not Unix.
Having said that, it is very likely that you also qualify as a Unix noob :)
Anyway, it is great to know that you want to learn something new, and learning Linux is great because it is a very powerful tool.
Regarding your problem, the solution probably is that you need to follow the instructions on this post precisely, not just as a general guide, but exactly step by step. I know that you did not follow the instructions correctly because all the libraries are included in the guide. Also, nowhere in the guide is the Ubuntu software center referred to, but you are using it. Why?. About the already installed libraries, they may be the run time libraries instead of the developer libraries, who knows what you actually installed.
If you follow the instructions presented here, exactly, copy pasted, line by line, without skipping anything, you will get the system correctly installed.
Also, make sure that you start with the same version of Ubuntu that is used here, and also use the same OpenCV version that is presented here.
In general, installing software in Linux is very easy. If you want to install the software Gimp for example, you just say something like:
sudo apt-get install gimpAnd that’s it, you will get your software installed, and it will be upgraded when new versions appear, etc. Also, you can just list many programs in that list, and all of them will be installed automatically, and all the required libraries as well. It is not difficult at all. Try doing the same thing in Windows, let’s say, install 100 programs and keep them upgraded. Pretty time consuming, isn’t it?
In the end, it looks hard to you because you are new to Linux. Once you get to know how to use Linux, you will find it easy to use. Compare how much time you have been using Linux vs how much time you have been using Windows, or any other OS.
By the way, why do you need the latest or a specific version of OpenCV?, this guide is for those people. If you just need to install any version of OpenCV, you can just install it directly using the Ubuntu Software Center (search for opencv).
This is really great… i had fun..:)
Thanks Shreya, it’s great that you had fun with it :)
I have done everything in the above steps but when Im trying to compile the code it shows that cv.h doesnt exists what is wrong with it and how am I suppose to fix it???
Looking forward for your reply
Hello Shehroze,
If you follow every step carefully, you will not get that error. Try it again, and follow everything step by step, copy pasting the commands.
Specifically, it may be that you skipped the step for configuring pkg-config, or maybe you did not restart the console or the PC.
Try running
pkg-config --libs opencvand see if that gives you the location of the opencv libraries.Hi, thanks for the post, but I am having serious problems running the examples. Mainly for all of them the error I am getting is that some of the files/folders do not exist.
Thanks in advance any help you could provide to fix this issue.
Hello Gus,
My guess is that you missed a step in the tutorial. Please re read it and follow every instruction exactly.
If the problem persists, share with us the exact error message and exactly what are you doing so that we can help you.
Thanks for answering. I repeat the steps very carefully, but I problem is still there. Also, during the installation steps I checked any problem and this are the ones that I found out:
1. During the step “cmake -D WITH_TBB=ON -D BUILD_NEW_PYTHON_SUPPORT=ON -D WITH_V4L=OFF -D INSTALL_C_EXAMPLES=ON -D INSTALL_PYTHON_EXAMPLES=ON -D BUILD_EXAMPLES=ON .”, the problem given was: “Could NOT find Doxygen (missing: DOXYGEN_EXECUTABLE) ”
2. During the step “Now, you are ready to compile and install OpenCV 2.2: 1. make 2. sudo make install “, there were several problems such “missing expected ‘;’ at end of member declaration”, “expected ‘)’ before ‘ofs’”, and “‘ptrdiff_t’ does not name a type”
3. For the step “There is a final step to configure Python with OpenCV. You need to copy the file cv.so into the correct place.”, the problem was: “cp: cannot stat `/usr/local/lib/python2.7/site-packages/cv.so’: No such file or directory”
4. When I run the first example in “Let’s check some demos included in OpenCV.
First, let’s see some C demos:”, the problem was: “no package opencv found”
My main goal is to write a C/C++ code in which I can use openCV, such the one shown in this example: http://stackoverflow.com/questions/10551423/how-to-stream-images-data-from-camera-in-c, but in Ubuntu 11.04. In that case what should be headers I should set? Will the ones shown in that example remain? If not, what headers should I use for Ubuntu?
Thanks in advance in all the help you could provide.
Gus, reading your first error, I can tell that the required libraries were not installed correctly. That is why you are having problems.
Make sure that all the libraries are correctly installed first (the large sudo apt-get install line at the beginning of the tutorial).
What version of Ubuntu are you using?, the guide that you are following is for Ubuntu 11.04. My guess is that you are using other version, and that is why the libraries are not getting installed.
If you have a newer version of Ubuntu, like 12.04 LTS, or 12.10, I recommend you to follow this guide instead:
http://www.samontab.com/web/2012/06/installing-opencv-2-4-1-ubuntu-12-04-lts/
And you should have solved all your problems.
Hi, actually, the version that I am using is Ubuntu 11.10. Any suggestion to install openCV for that distro? Thanks for any suggestion.
Gus,
That explains your problem. Different versions of Ubuntu may have different versions of the available libraries. So, some of the libraries are not being correctly installed.
One option is to manually check every library and search for the appropriate ones for your version, although you kinda need to know what you are doing.
The other option is to just install 12.04 LTS and follow the tutorial that I linked in the previous comment. I recommend you doing this because it is easier for you, and 12.04 is a more stable release (LTS) and gets supported for longer time compared to other non LTS releases.
After upgrading to Ubuntu 12.04 LTS, the directions from the page you mentioned let the installation to work perfectly. Thanks a lot for helping.
Good to know that it worked for you gus
I have another question related with the code I am working on, and I was hoping you could help me.
Using openCV on Ubuntu 12.04, I am trying to get images from the webcam installed in my laptop (the one that comes with it). Part of the code is the following:
#include “cv.h”
#include “highgui.h”
…
CvCapture *capture = 0;
capture = cvCaptureFromCAM(0);
…
The problem is that the line “capture = cvCaptureFromCAM(0);” gives the following error: “VIDIOC_QUERYMENU: Invalid argument”. I have checked that the camera works via “luvcview -d /dev/video0”, and I do not know what else to do. I have thought the argument for cvCaptureFromCAM may be wrong, but if so, I do not know how to get the correct one (I do not have an external camera connected to the laptop, and I also tried with “-1” and “CV_CAP_ANY” as arguments).
Can you give me any advise to fix this problem?
Thanks in advance.
Gus,
First of all, I would suggest you to run the samples that use the camera, like lkdemo, or facedetect. If those work, then the problem is in your code. If those do not work, you may need to check the camera settings, maybe reinstall OpenCV with a different configuration, or some other suggestion that you get from googling your error.
Great post. I found it tremedously helpfull, thanks ;)
Thanks yak
thanks every body so mutch.
I am glad it worked for you Morteza
Fantastic post. Your post worked great for the latest OpenCV 2.4.3 with a few minor adjustments.
Thanks Gary, I am glad it worked.
hi… mr samontab.. thank you for your tutorial.. it’s helping me..
btw, i got an error like this…
./displayimage: error while loading shared libraries: libopencv_calib3d.so.2.4: cannot open shared object file: No such file or directory
how to fix that..
Hello arifkhumaidi,
That means that you skipped some parts of the tutorial, at least this part:
Try running that and you should be able to use the library. If it still does not work, try following the instructions precisely, and it will work.
Thanks very much – works every time !
Hi Hull,
I am happy to hear that it worked for you as well.
Many thanks !!
I am a new Ubuntu user and I had tremendous difficulty to get the correct packages and install. You saved my day and I should say my week :)
Thank you very much
Hello Julien,
I am happy that I could help you.
hi
I’m trying to install OpenCV 2.2 on Ubuntu 12.04.2 — I’ve come across 1 problem so far regarding conflict between libjpeg62-dev and libtiff4-dev — when trying to install libtiff4-dev, I get this error:
The following package was automatically installed and is no longer required:
libjpeg62
Use ‘apt-get autoremove’ to remove them.
The following extra packages will be installed:
libjpeg-dev libjpeg-turbo8-dev libjpeg8-dev libtiffxx0c2
The following packages will be REMOVED:
libjpeg62-dev
The following NEW packages will be installed:
libjpeg-dev libjpeg-turbo8-dev libjpeg8-dev libtiff4-dev libtiffxx0c2
Should OpenCV 2.2 still work, given that libjpeg62-dev is not installed?
I’m quite new to Ubuntu, so just trying to make things work :).
Any help would be appreciated.
I’ve gotten it to work! Tx so much Sebastian! Made my thesis life a whole lot easier.
Much appreciated.
Hello M. A. Jakoet,
I am glad that it was helpful to you. Best of luck in your thesis.
First of all, thank you so much for providing all of this information!
But I encountered a problem. When I get to the place where I’m compiling all of the C samples it fails on each and every compilation. It reports:
Package opencv not found in the pkg-config search path.
Perhaps you should add the directory containing ‘opencv.pc’
to the PKG_CONFIG_PATH environment variable.
No package ‘opencv’ found.
I had followed all of your instructions, including adding the lines to the /etc/bash.bashrc
file, …
PKG_CONFIG_PATH=$PKG_CONFIG_PATH:/usr/local/lib/pkgconfig
export PKG_CONFIG_PATH
and restarted the computer. But I get those errors for each and every compiled program.
I’ve looked around and cannot find the opencv.pc that the error message references.
How do I get this working?
Hi Roger,
First you need to make sure that OpenCV is correctly configured with PKG_CONFIG.
Run this command:
And then this one:
They should give you the libraries and the include directories of OpenCV respectively.
If they do not give you that, the samples will not compile.
Maybe try again following the instruction more carefully, or check if anything has changed in a new version.
If you use the exact same version of the OS and OpenCV as the tutorial, it should just work.
I hve tried to install open cv in ubuntu 12.04 but there was one error that is (Unable to locate package libfaac-dev)
please, could you help me to overcome this?
Hi Ahmed,
You should be able to install it on a fresh Ubuntu 12.04 system.
Anyway, I googled it, and this showed up on the first page:
http://superuser.com/questions/467774/how-to-install-libfaac-dev
To install OpenCV using the terminal on Ubuntu:
$ su –
# apt-get update
# apt-get install build-essential
# apt-get install libavformat-dev
# apt-get install x264 v4l-utils ffmpeg
# apt-get install libcv2.3 libcvaux2.3 libhighgui2.3 python-opencv opencv-doc libcv-dev libcvaux-dev libhighgui-dev
http://namhuy.net/1205/how-to-install-opencv-on-ubuntu.html
Hi,
I used ” /usr/local/lib” to link libraries, but when I Build I received this :
/usr/local/lib/libopencv_contrib.so: file not recognized: File format not recognized
Please help me to solve this problem ! Thanks !
What command are you using?
Just follow the tutorial exactly and it should work.
am tring to run a script on Matlab and this script use opencv, i install opencv 3.0 and when i running the script it gives an error
Processing: dataset/MICC-F220/CRW_4853tamp1.jpg (1/220)
lib/sift/bin/siftfeat: error while loading shared libraries: libopencv_core.so.2.3: cannot open shared object file: No such file or directory
Hi mohamed,
Well, the script wants to use OpenCV 2 (libopencv_core.so.2.3) but you have OpenCV 3. They are different versions. Try recompiling siftfeat with your current OpenCV, or just install the requested OpenCV version.