Do you want to start editing your own photos?. You do not have to pay for it, you can do it for free!.
There are many free and open source image processing, or photo editing, programs out there. They are great in what they do and they cost you nothing to try them out. Their main problem is that most people do not know what they are capable of. In this post, I will show some of the cool stuff you can do with them.
General Photo Editing
Most of us need software for every day image manipulation. This covers basic stuff like resizing, cropping, adjusting contrast and brightness, and so on. Also, many people often need software for retouching their photos, reducing the red eye effect, or removing objects from their pictures.
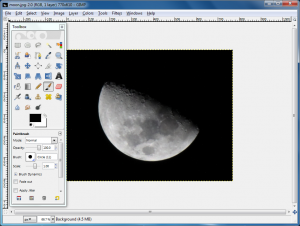
Gimp is one of the most versatile open source software for general photo editing. This software can be used for general purposes, such as resizing, cropping, adjusting color, brightness, red eye reduction, noise reduction, and many other usages. Also, you can install plug-ins to Gimp, adding even more functionality.
Panoramas
Sometimes the angle of view of your camera does not cover the entire object that you want to photograph, like a tall building or a wide landscape. In these situations you can stitch a panorama from a bunch of normal pictures taken with your camera.
Hugin is an excellent software for creating panoramas. It is easy to use and the results are incredible. You just give Hugin your pictures, select what type of panorama you want and it creates an awesome panorama for you.
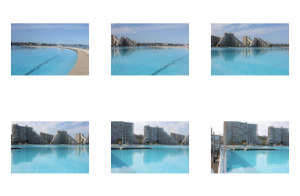
For example, it is hard to get the world’s largest pool in just one shot, so I took a bunch of pictures of it.
And then I used Hugin to create a panorama using these images.
High Dynamic Range (HDR)
The human eye is capable of discerning a high range of tones of light in a given scene, from dark shadows to bright highlights. Regular cameras, on the other hand, normally produce Low Dinamic Range (LDR) images, such as jpgs, which only allow you to capture details from shadows or highlights, but not from both at the same time. This is because jpgs only use 8 bits per channel to represent the scene.
HDR images use more than 8 bits to represent the scene, so they can capture more highlights and shadows compared to a regular shot. The problem is that only expensive, specialized cameras can capture HDR images. Here is when Luminance HDR (formerly known as Qtpfsgui) comes to save the day.
Luminance HDR is a software that allows you to merge pictures with different exposure settings to create a single HDR image containing all the relevant information from these images. The generated image has more than 8 bits, usually 16, and because of that it cannot be presented in regular monitors (they only use 8 bits per channel). When you have an HDR, this program allows you to tonemap it into an 8 bit image. Tonemapping is a technique used for generating a LDR from a HDR conserving the most information possible.
In other words, just as in the case of a panorama where you can generate a picture of the complete scene by merging pictures that cover different regions of the scene, here you can merge together pictures taken with different exposures so that you can cover the entire range of lightness of the scene.
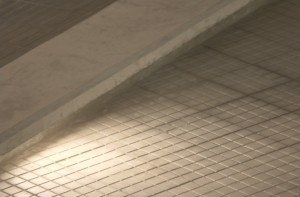
For example, here is a bench that had a single light on just one side of it at night. You can see that the first shot does not show the details of the highlights or the shadows, but the rest of the picture looks correctly exposed. On the second picture, only the details of the highlights are presented and on the final image, only the details of the shadows are present. As you can see, it is not possible to present all the information of the scene in just a single shot.
I used Luminance HDR to create a HDR image from these three pictures. Then, with this HDR image, you can tone map it into a new LDR image that contains the details from the shadows and the highlights in a single image. Here is an example of a tone mapping operator that produces realistic images, such as Reinhard or Durand.
You can generate more artistic images by using different tone mapping operators, such as Mantiuk or Fattal.
Raw Photos
A Raw photo is just the information about the amount of light that the camera gathered during the capture. It is not tied with any color space or image format. Actually, every camera manufacturer has their own Raw format. Because the white balance has not been set yet, the photographer can set it later using a special software instead of letting the camera set it on site. There are many discussions about Raw vs Jpg on the web, but I will just assume that you are interested in processing a Raw image :)
UFRaw is great software for dealing with Raw photos. It is installed as a stand alone application as well as a Gimp plug-in. This way, you can import any Raw image into Gimp easily. With this software, you can read Raw images, change the white balance, exposure compensation, demosaicing algorithm used to generate the colors, and even more options.
Batch Processing
Sometimes you need to apply the same operation to many photos. This can be time consuming if you apply the operation to each one of them independently. A common case is resizing, but you may need to apply a different operation.
You can use imagemagick for processing all your images with just one command. It is an extremely powerful image editor, and it is run on the command line, so you can even run it on your server. It covers all the basic features that you may need, such as resizing, cropping, changing image formats, etc, as well as more advanced ones.
The Book
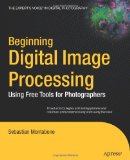 I wrote a book about using free tools for editing your photos. If you are interested in it, you can check it out from your local library or browse the preview at Google Books.
It is called Beginning Image Processing: Using Free Tools for Photographers. The idea of this book is to present many typical scenarios where you need to edit or process your images and then explain how to achieve that effect using a free tool. There are many screen shots in the book that help you to understand how to use these programs in an easy way.




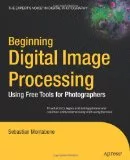
This book looks familiar… :-D
Hello, I have a quistion about Opencv.
which of c++ and python is best with opencv?
OpenCV is built primarily for C++, so that would be the best choice in general. Some functions may not be available on the python binding.
On the other hand, if you know a lot of Python, and nothing of C++, it would be better to use Python….
Also, Python is good for quick prototypes whereas C++ is good for the final product because it runs faster than Python.